Transform your outdoor space into a magical nighttime oasis with modern smart garden automation systems that revolutionize how we illuminate our gardens. Automated lighting systems have evolved from simple timers to sophisticated networks that respond to motion, ambient light, and even your daily routines. These intelligent systems reduce energy consumption by up to 80% compared to traditional landscape lighting while providing enhanced security and breathtaking aesthetic appeal.
Picture stepping into your garden at dusk as pathway lights gradually illuminate your steps, while feature lights highlight prized plants and water features with perfect timing. Motion sensors activate security lights in vulnerable areas, and everything can be controlled from your smartphone, whether you’re relaxing on your patio or traveling across the country.
Today’s automated lighting solutions combine practical functionality with artistic expression, allowing gardeners to create dynamic lighting scenes that change with the seasons, weather conditions, or special occasions. From solar-powered options that minimize environmental impact to WiFi-enabled systems that integrate with your home automation, these innovations make it easier than ever to extend your garden’s beauty well into the evening hours.
How Automated Garden Lighting Systems Work
Core Components
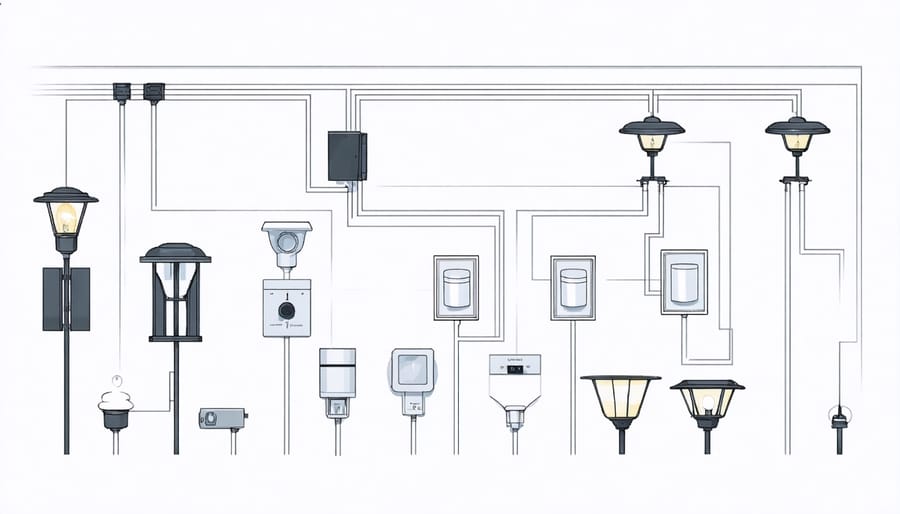
Every automated lighting system relies on three essential components working together in perfect harmony. At the heart of the system is the controller – think of it as the brain that manages your entire lighting setup. Modern controllers come with user-friendly interfaces and can be operated through smartphone apps, making it easy to adjust schedules and lighting patterns with just a few taps.
The system’s eyes are its sensors, which come in various types. Motion sensors detect movement and trigger lights accordingly, while light sensors measure natural daylight levels to determine when artificial lighting should activate. Some advanced systems also include temperature sensors to adjust lighting based on weather conditions.
The final piece of the puzzle is the lighting fixtures themselves. Today’s automated systems typically use energy-efficient LED lights, which come in different styles to suit various garden needs. You’ll find spotlights for highlighting features, path lights for safe navigation, and ambient lights for creating atmosphere. Many fixtures are now weatherproof and designed to withstand outdoor conditions year-round, with some even offering color-changing capabilities for added versatility.
When choosing components, ensure they’re compatible with each other and suitable for your garden’s specific requirements.
Smart Integration Features
Modern automated lighting systems bring convenience to your fingertips through intuitive smartphone apps and seamless smart home integration. With user-friendly apps, you can control your garden lights from anywhere, adjusting brightness levels and creating custom lighting scenes that complement your outdoor space.
The scheduling features are particularly helpful for maintaining a consistent garden atmosphere. You can set your lights to turn on at sunset and off at sunrise, or create custom schedules that match your outdoor entertaining needs. Many systems even incorporate motion sensors and weather data to adjust lighting automatically based on natural conditions.
Voice control compatibility with popular platforms like Alexa and Google Home adds another layer of convenience. Imagine being able to say “turn on garden lights” while your hands are full of gardening tools! Most modern systems also offer helpful automation recipes, letting you coordinate your lights with other garden features like fountains or irrigation systems.
For those new to smart technology, don’t worry – these systems are designed to be user-friendly, with step-by-step setup guides and responsive customer support to help you get started.
Choosing the Right System for Your Garden
Solar vs. Wired Systems
When it comes to powering your automated garden lighting, you have two main options: solar-powered systems and traditional wired setups. Each has its unique advantages, much like other forms of garden monitoring technology, and choosing between them depends on your specific needs.
Solar-powered systems are gaining popularity among eco-conscious gardeners, and it’s easy to see why. They’re incredibly cost-effective in the long run, with no electricity bills to worry about. Installation is usually straightforward – no need to dig trenches for wiring or hire an electrician. Plus, they’re completely portable, allowing you to redesign your garden lighting layout whenever inspiration strikes.
However, solar systems do have their limitations. They rely on sufficient sunlight exposure, which means they might not perform as well in heavily shaded areas or during extended cloudy periods. The initial cost can also be higher than wired options, though this typically balances out over time.
Wired systems, on the other hand, offer consistent, reliable performance regardless of weather conditions. They generally provide brighter illumination and can support more powerful fixtures. You’ll never have to worry about battery life or charging times. The main drawbacks are the installation complexity, which often requires professional help, and ongoing electricity costs.
For those seeking the best of both worlds, hybrid systems are becoming increasingly available, combining solar charging with traditional power backup for uninterrupted operation.

Weather-Resistant Features
When installing automated lighting systems in your garden, you’ll be glad to know that modern outdoor lighting solutions are built to withstand various weather conditions. Most quality systems feature IP65 or IP67 ratings, meaning they’re protected against dust and can handle heavy rain or temporary submersion.
The housings of these fixtures are typically crafted from durable materials like powder-coated aluminum or high-grade stainless steel, which resist rust and corrosion. The light fixtures often include rubber gaskets and weatherproof seals that prevent moisture from reaching sensitive electrical components.
Solar-powered systems are particularly resilient, as they’re designed with sealed components and UV-resistant materials that prevent degradation from sun exposure. For wired systems, the cables are specially insulated and often buried underground in protective conduits to guard against moisture and temperature fluctuations.
Many automated lights also feature temperature-regulation systems that help them perform reliably in both hot summers and cold winters. Some advanced models even include self-cleaning lenses that shed water and resist dirt accumulation, reducing maintenance needs.
To ensure maximum longevity, look for systems with features like:
– Corrosion-resistant finishes
– UV-stabilized materials
– Sealed electrical connections
– Impact-resistant lenses
– Drainage holes to prevent water accumulation
Remember to check the specific weather ratings for your chosen system, especially if you live in an area with extreme weather conditions.
Installation Tips for Success
Planning Your Layout
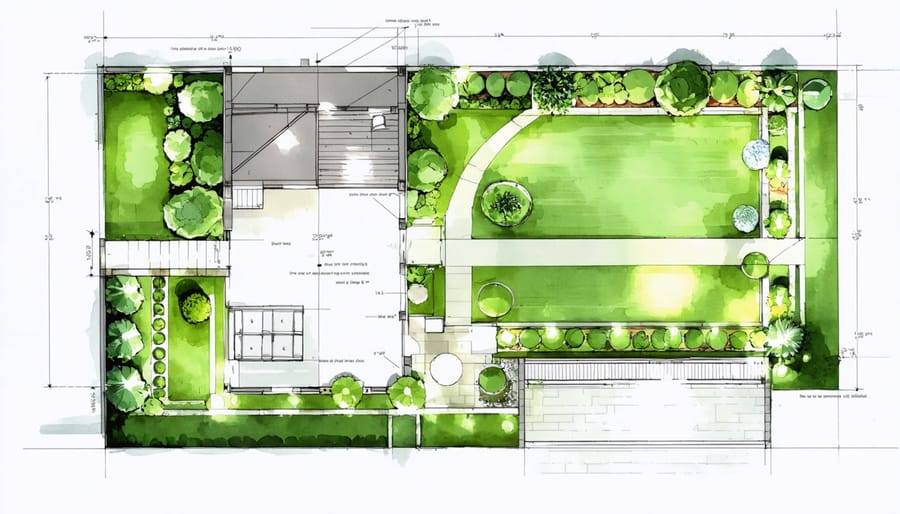
Planning your garden’s lighting layout is like composing a beautiful nighttime symphony. Start by walking your garden space at dusk, noting areas that naturally fall into shadow first. These spots will need primary lighting consideration. Make a rough sketch of your garden, marking key features like pathways, flower beds, and architectural elements.
For pathways, plan lights every 8-10 feet to ensure safe navigation without creating an airport runway effect. When highlighting plants, consider their mature size and seasonal changes. Position lights at varying heights – some at ground level for low-growing plants, others mounted higher for trees and tall shrubs.
Layer your lighting by combining different techniques. Use uplighting to showcase specimen trees, downlighting for gentle illumination of gathering spaces, and cross-lighting to add depth to garden features. Remember to account for power source locations and ensure your transformer can handle the total wattage of your planned fixtures.
Create zones based on usage patterns. Areas you frequently use in the evening, like patios or entrance paths, should be prioritized. Consider seasonal adjustments too – you might want brighter lighting during winter months when days are shorter.
Don’t forget to plan for future expansion. Install slightly larger conduit than currently needed and consider adding extra connection points. This forethought will make it easier to add more fixtures as your garden grows and evolves.
DIY vs. Professional Installation
Installing automated lighting systems can be an exciting project, and many gardeners wonder whether to tackle it themselves or hire a professional. The good news is that many modern systems are designed with DIY installation in mind, especially wireless and solar-powered options that don’t require complex wiring.
DIY installation is suitable when you’re working with:
– Battery or solar-powered lights
– Plug-and-play systems
– Simple timer-based setups
– Wireless controllers
– Surface-mounted fixtures
However, professional installation becomes necessary when dealing with:
– Hard-wired systems requiring electrical work
– Complex automation networks
– Underground wiring installations
– High-voltage lighting
– Integration with existing home automation systems
Consider your comfort level with electrical work and the complexity of your desired setup. While DIY installation can save money, mistakes can be costly and potentially dangerous. If you’re unsure about any aspect of the installation, it’s better to consult a professional.
For DIY installations, always read the manufacturer’s instructions thoroughly, create a detailed plan before starting, and ensure you have all necessary tools. Remember to check local regulations regarding outdoor electrical installations – some areas require certified electricians for certain types of lighting work.
Professional installation typically costs more upfront but offers peace of mind through proper setup, warranty coverage, and expert guidance on optimal light placement and programming.
Maintenance and Troubleshooting
Seasonal Maintenance Tasks
Keeping your automated lighting system in top shape requires different care approaches throughout the year. In spring, start by checking all fixtures for winter damage and clean any debris that’s accumulated. Gently wipe down light covers with a damp cloth, and trim back any new plant growth that might obstruct sensors or lighting paths.
Summer maintenance focuses on adjusting timing schedules to accommodate longer daylight hours. Check that motion sensors aren’t triggered by growing foliage, and ensure all cables remain properly buried and protected from lawn care equipment. During this season, it’s also important to clean solar panels more frequently, as pollen and dust can reduce their efficiency.
As autumn approaches, prepare your system for shorter days by readjusting timers and checking that all connections are waterproof before the wet season begins. Clear fallen leaves regularly to prevent them from covering solar panels or blocking motion sensors. This is also an excellent time to replace any bulbs that are showing signs of dimming.
Winter requires the most vigilant maintenance. Ensure all exposed cables are properly insulated, and regularly clear snow and ice from solar panels and motion sensors. If you live in an area with severe winters, consider adding protective covers to ground-level fixtures to prevent water damage from melting snow.
Throughout all seasons, perform monthly checks of your system’s battery backup (if applicable), test motion sensors, and verify that all zones are functioning correctly. Keep a maintenance log to track when you’ve performed these tasks and note any issues that arise. This helps you stay proactive with system care and quickly identify any developing problems.
Common Issues and Solutions
Even the most reliable automated garden systems can encounter occasional hiccups. Let’s explore some common issues and their straightforward solutions to keep your lighting system running smoothly.
If your lights aren’t turning on at scheduled times, first check your system’s power source and connections. Sometimes, it’s as simple as replacing batteries in sensors or resetting a tripped circuit breaker. For solar-powered systems, ensure panels are clean and positioned to receive maximum sunlight.
Motion sensors occasionally becoming oversensitive or unresponsive is another frequent concern. Try adjusting the sensitivity settings and clearing any debris or cobwebs that might interfere with the sensor’s function. If problems persist, a quick reset of the sensor usually does the trick.
Dim or flickering lights often indicate dying bulbs or loose connections. Start by checking all wire connections and tightening them if necessary. For LED systems, ensure your power supply matches the voltage requirements of your lights. Remember to clean light fixtures regularly, as dirt and debris can significantly reduce brightness.
Wi-Fi connectivity issues can disrupt smart lighting systems. Position your router closer to the garden control hub or consider adding a Wi-Fi extender. Sometimes, simply restarting your router and control hub can resolve connection problems.
For smartphone app control issues, keep your app updated to the latest version and ensure your phone’s operating system is compatible. If problems continue, try uninstalling and reinstalling the app.
Remember, most issues have simple solutions, and your system’s user manual often contains helpful troubleshooting guides. When in doubt, don’t hesitate to contact the manufacturer’s support team for assistance.
As we’ve explored throughout this article, automated lighting systems offer a brilliant way to transform your garden into a magical nighttime retreat while providing practical benefits for safety and convenience. These innovative systems have come a long way, making them more accessible and user-friendly than ever before.
By implementing automated garden lighting, you’re not just illuminating your outdoor space – you’re creating an enchanting atmosphere that extends your living area and enhances your home’s overall appeal. The combination of energy efficiency, convenience, and aesthetic appeal makes these systems a worthwhile investment for any garden enthusiast.
Remember that starting small is perfectly fine. You might begin with a simple timer-controlled pathway lighting system and gradually expand to include more sophisticated features like motion sensors or smart controls. The key is to choose a system that matches your specific needs and garden layout.
The future of gardening is bright, and automated lighting systems are leading the way in making our outdoor spaces more enjoyable and sustainable. Whether you’re looking to highlight your prized plants, create a safer environment, or simply extend your evening enjoyment of the garden, automated lighting can help you achieve these goals with minimal effort.
Take the first step toward enhancing your garden with automated lighting – you’ll be amazed at how this technology can transform your outdoor space into a 24-hour paradise that you, your family, and your guests will enjoy for years to come.