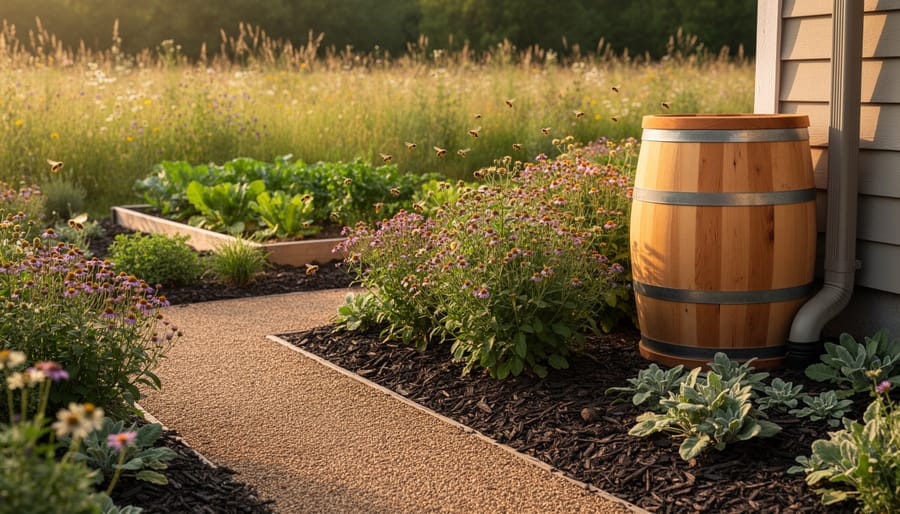
Transform empty walls, fences, and tight spaces into thriving food gardens without breaking the bank or requiring advanced carpentry skills. Vertical gardening solves the modern gardener’s biggest challenge: producing abundant harvests when ground space is limited or nonexistent.
Stack hanging shoe organizers against sunny walls and fill each pocket with herbs, strawberries, or lettuce—this $15 solution yields dozens of plants in just two square feet. Repurpose wooden pallets by standing them upright, adding landscape fabric to create pockets, and planting trailing tomatoes or cascading flowers that grow through the slats. Attach rain gutters horizontally to fence posts at staggered heights for an instant salad garden that drains perfectly and keeps produce clean off the ground.
Whether you’re working with a tiny balcony, a shaded courtyard, or simply want to maximize your existing garden beds, vertical growing multiplies your planting area while reducing back strain, preventing pest damage, and creating stunning living walls that neighbors will admire. These projects require minimal materials—most sourced from hardware stores or your own garage—and take just a weekend to complete.
The beauty of DIY vertical gardens lies in their flexibility. You’re not locked into expensive pre-made systems or limited by what garden centers stock. Instead, you’ll learn to see potential in everyday objects and adapt designs to your specific space, climate, and favorite crops. Even if you’re just starting out with our beginner gardening guide, these approachable projects will have you harvesting fresh produce from previously wasted vertical spaces within weeks.
Why Vertical Gardening Changes Everything for Small Spaces
I’ll never forget the moment I realized my tiny balcony could grow more than just a few sad tomatoes in pots. After installing my first trellis system, I suddenly had cucumbers climbing upward, herbs cascading from wall-mounted planters, and strawberries thriving in a vertical tower—all in the same 4×6 foot space that previously held exactly three containers. That’s when vertical gardening stopped being just an interesting concept and became my gateway to a truly productive garden.
The most obvious transformation happens with space efficiency. When you grow upward instead of outward, you’re essentially creating multiple layers of growing area within the same footprint. I’ve helped neighbors convert their cramped patios into thriving gardens by simply thinking vertically. One friend now grows over 40 herb plants on a wall that’s barely three feet wide—something impossible with traditional horizontal planting. These small space gardening solutions genuinely multiply your growing capacity without requiring more square footage.
But here’s what surprised me most: my plants actually became healthier when I moved them vertical. Better air circulation means fewer fungal diseases—I’ve dealt with far less powdery mildew since my squash leaves aren’t touching the ground. Plus, vertical structures naturally improve sun exposure, allowing light to reach more foliage throughout the day.
Maintenance becomes remarkably easier too. No more kneeling on muddy ground or straining your back to reach plants. Everything sits at eye level or within comfortable reach. I harvest cherry tomatoes while sipping my morning coffee, and checking for pests takes minutes instead of the half-hour ground-level inspection I used to do.
The aesthetic impact shouldn’t be underestimated either. Vertical gardens transform plain walls into living artworks. My previously boring fence now showcases a tapestry of green beans, morning glories, and climbing roses that neighbors actually stop to photograph. You’re not just growing food or flowers—you’re creating a stunning focal point that elevates your entire outdoor space.
Essential Design Principles Before You Start Building
Assessing Your Space and Light Conditions
Before you start building, take a thoughtful walk around your space with fresh eyes. You’re looking for vertical surfaces that could become thriving plant walls!
**Step 1: Identify Your Surfaces**
Look at walls, fences, balcony railings, or even sturdy posts. South-facing walls receive the most sunlight in the Northern Hemisphere, making them ideal for sun-loving vegetables and herbs. East-facing spots get gentle morning light—perfect for leafy greens. North-facing walls? They’re surprisingly great for shade-tolerant plants like ferns and certain herbs.
**Step 2: Check Sun Exposure**
Spend a day observing how sunlight moves across your potential garden spots. Note the hours of direct sun each area receives. Full sun means 6+ hours, partial sun is 3-6 hours, and shade is under 3 hours. Grab your garden planning journal and sketch this out—it’ll be invaluable when choosing plants later.
**Step 3: Assess Structural Integrity**
Can your wall or fence support weight? A simple knock test helps—solid surfaces work best. For rentals or delicate surfaces, consider freestanding structures that lean rather than drill.
**Step 4: Consider Water Access**
How close is your water source? Vertical gardens dry out faster than ground beds, so convenient watering matters!
Understanding Weight and Structural Support
Before you start attaching planters to your walls or hanging herb gardens from your balcony, let’s talk about something that might not sound exciting but is absolutely essential: making sure everything stays safely in place! Don’t worry—you don’t need an engineering degree to figure this out.
Here’s a simple way to think about weight: a container filled with wet soil weighs significantly more than you’d expect. A typical 12-inch planter with moist soil can easily weigh 15-20 pounds, and that’s before adding plants and water. When I first started vertical gardening, I made the mistake of underestimating this and watched a beautiful arrangement come crashing down—lesson learned!
For wall-mounted systems, your first step is identifying what type of wall you’re working with. Drywall alone won’t support heavy loads, but finding the wooden studs behind it (using an inexpensive stud finder) gives you a secure anchor point. For concrete or brick walls, use masonry anchors designed for outdoor use.
A good rule of thumb: if you can lift it comfortably with one hand when it’s fully watered, standard wall anchors rated for 20-30 pounds should work fine. For heavier installations like multiple-tiered systems, always mount into studs using heavy-duty screws or lag bolts.
Hanging systems from overhead structures need similar consideration. Check that your pergola, fence post, or ceiling beam can handle not just the current weight, but also account for plant growth and water absorption. When in doubt, distribute weight across multiple mounting points rather than concentrating everything in one spot.
Innovative DIY Vertical Garden Projects You Can Build This Weekend
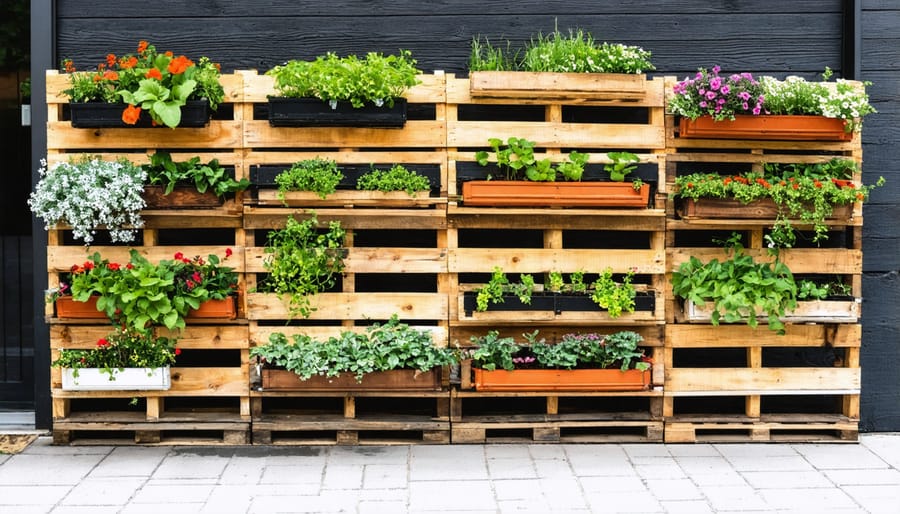
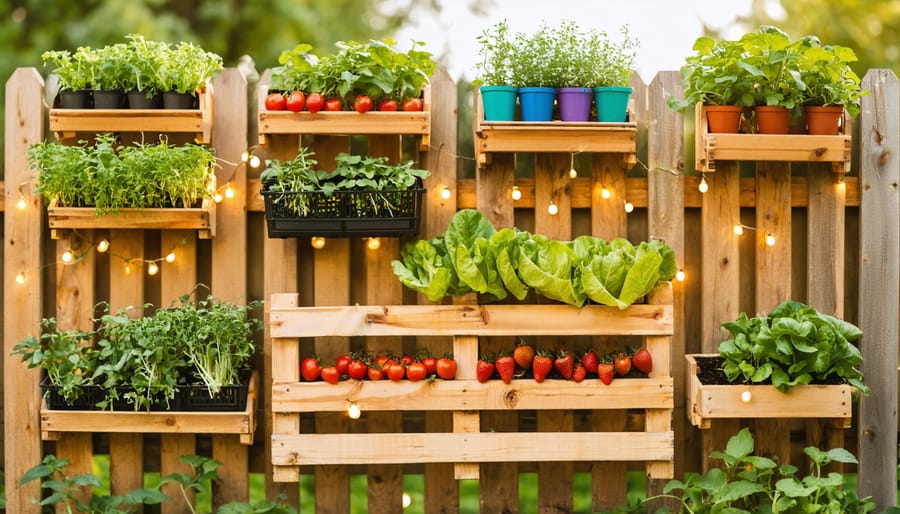
Pallet Garden Walls: The Budget-Friendly Classic
There’s something wonderfully satisfying about transforming a discarded wooden pallet into a thriving vertical garden. I still remember the first time I tried this project—my neighbor was renovating their deck and had three pallets headed for the dumpster. Now those same pallets are bursting with herbs and strawberries on my sunny back wall!
**Finding and Preparing Your Pallet**
Start by sourcing a heat-treated pallet marked with “HT” (not chemically treated ones marked “MB”). You’ll find these behind furniture stores, garden centers, or through online marketplace groups. Look for pallets in good condition with tight, sturdy slats.
Once you’ve got your pallet, give it a thorough scrub with soapy water and let it dry completely. Sand down any rough edges or splinters—your hands will thank you later! If you want your pallet to last several seasons outdoors, apply a non-toxic wood sealant or linseed oil. Skip the toxic paints and stains since you’ll be growing edibles.
**Setting Up for Planting**
Lay your pallet flat and staple landscape fabric to the back and bottom, creating pockets between the slats. This prevents soil from falling through while allowing drainage. Some gardeners also add a backing board for extra stability, though I’ve found the fabric alone works perfectly fine.
Fill each pocket with quality potting mix—don’t skimp here, as good soil makes all the difference. I mix in some compost for extra nutrients. Once filled, let your pallet rest horizontally for two weeks before standing it upright. This gives plants time to establish roots.
**Best Plants for Pallet Gardens**
Shallow-rooted plants work beautifully in pallets. Try lettuce, spinach, strawberries, herbs like basil and thyme, or trailing flowers like petunias. Avoid deep-rooted vegetables like tomatoes—they’ll struggle in the limited space.
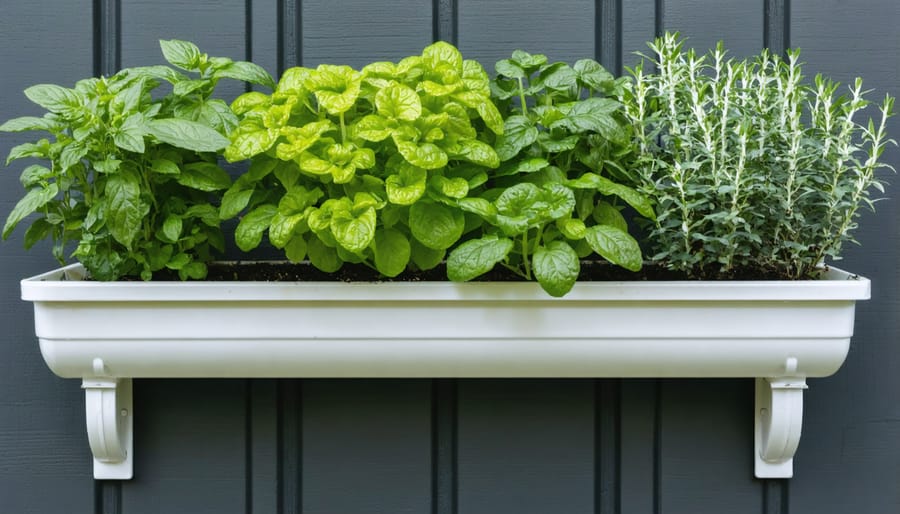
Gutter Gardens for Herbs and Greens
Rain gutters aren’t just for roofs—they make wonderfully practical vertical planters that are both affordable and surprisingly attractive! I discovered this technique a few years ago when I had limited ground space but an empty fence begging for greenery. The shallow depth of gutters is absolutely perfect for herbs and salad greens with shallow root systems.
**What You’ll Need:**
Start by gathering vinyl or aluminum rain gutters (10-foot sections work well), end caps, gutter brackets or sturdy wire, a drill with a 1/4-inch bit, potting mix, and of course, your favorite herb or lettuce seedlings.
**Assembly Steps:**
First, cut your gutters to your desired length—I typically go with 4 to 6-foot sections for easier handling. Snap end caps onto both sides of each gutter section, making sure they’re secure. Now here’s the crucial part: drill drainage holes every 6 inches along the bottom. Without proper drainage, your plants will get waterlogged and unhappy.
Mount your brackets to a sunny fence or wall, spacing them about 12 inches apart vertically to create that cascading effect. This staggered arrangement not only looks beautiful but ensures lower rows still receive adequate sunlight. Secure each gutter firmly—remember, they’ll be heavier once filled with soil and water.
Fill gutters with quality potting mix, leaving about an inch at the top. Plant your herbs or greens, spacing them according to their mature size. Basil, cilantro, lettuce, and spinach absolutely thrive in this setup. Water gently at first, and you’ll be harvesting fresh greens in just weeks!
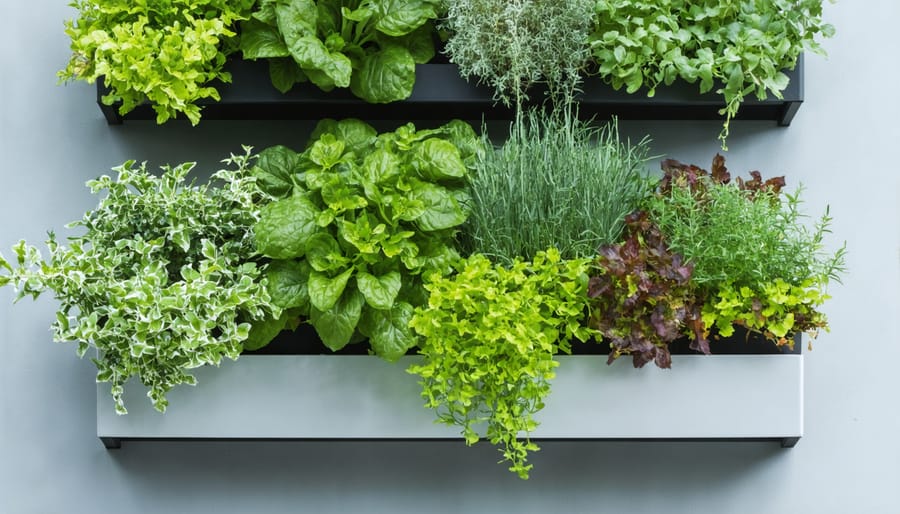
Pocket Planter Systems Using Fabric or Felt
Fabric pocket planters are my favorite recommendation for beginners because they’re incredibly forgiving and surprisingly affordable. These vertical systems use felt or sturdy fabric with built-in pockets that cascade down a wall, creating a living tapestry of plants. I remember my first attempt—I hung one on my balcony railing, and within weeks, I had fresh herbs just steps from my kitchen door.
You can purchase ready-made pocket planters online, but making your own is simple and allows for customization. For a DIY version, you’ll need heavy-duty landscaping fabric or thick felt (at least 1-2mm), which naturally resists mold and provides excellent drainage. Cut your fabric to your desired height and width, then create pockets by folding sections up and stitching both sides with outdoor thread or a heavy-duty stapler. Space pockets 8-10 inches apart to give plants room to grow.
The beauty of fabric planters lies in their drainage—excess water naturally seeps through, preventing root rot. However, this means they dry out faster than traditional pots, so check moisture levels daily during hot weather.
These systems work brilliantly for shallow-rooted plants. My top picks include lettuce, spinach, strawberries, and compact herbs like thyme and oregano. Avoid heavy feeders or deep-rooted vegetables like tomatoes—they’ll struggle in the limited soil depth.
Installation is straightforward: mount a wooden frame or hang directly on hooks attached to your wall. Just ensure whatever surface you choose can handle the weight when soil is moist. Position your planter where it receives appropriate light for your chosen plants, and you’re ready to grow!
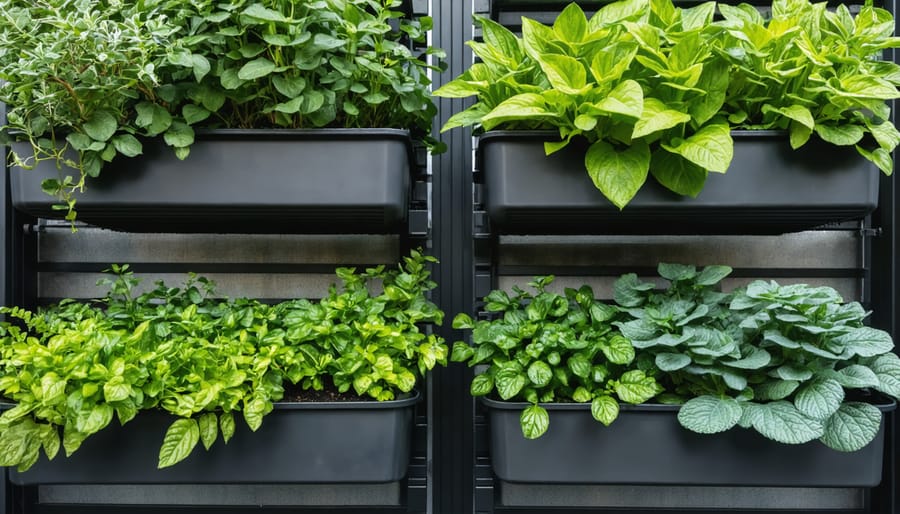
Modular Box Frame Gardens
One of my favorite vertical gardening projects is building modular box frame gardens—they’re like grown-up building blocks for your plants! These versatile systems let you stack frames vertically or mount them on walls, and the best part? You can rearrange them whenever inspiration strikes or your gardening needs change.
**Getting Started with Materials**
For a basic modular box frame, you’ll need untreated cedar or pine boards (1×6 inches work beautifully), galvanized corner brackets, wood screws, landscape fabric, and sturdy wall-mounting hardware. I always recommend cedar because it naturally resists rot, though it’s pricier. If you’re on a budget, pine treated with non-toxic wood sealer works just fine. You’ll also need basic tools: a drill, saw, measuring tape, and level.
**Building Your First Frame**
Start with frames measuring 24×24 inches—they’re manageable yet spacious enough for several plants. Cut four pieces of lumber to length, then connect the corners using L-brackets on the inside. This creates a clean exterior look while maintaining structural integrity. Before assembly, I like to pre-drill holes to prevent the wood from splitting—trust me, I learned this the hard way!
Line the bottom with landscape fabric, stapling it securely to prevent soil from escaping while allowing drainage. For mounting, use heavy-duty D-ring hangers rated for at least 20 pounds, even though your frame might weigh less. It’s better to over-engineer than watch your tomatoes crash to the ground!
**Stacking and Configuration Tips**
For stackable systems, add small wooden dowels to the corners of each frame that fit into corresponding holes in the frame above. This creates stability without permanent attachment. Master gardener Patricia Rodriguez, whom I interviewed last spring, recommends leaving 2-3 inches between stacked frames for air circulation and easier harvesting. She plants trailing herbs in upper boxes and compact vegetables below—a combination that’s both practical and beautiful!
Repurposed Container Vertical Gardens
One of my favorite things about vertical gardening is discovering how everyday household items can transform into thriving planters. You’d be amazed at what’s hiding in your garage or kitchen that could become your next garden feature!
Let’s start with mason jars – those versatile kitchen staples work beautifully for herbs and small flowers. Simply attach hose clamps to a wooden board mounted on your wall, slide the jars through, and you’ve got an instant kitchen herb garden. I love placing mine near a sunny window where I can snip fresh basil while cooking. The clear glass lets you monitor soil moisture and root development, making it perfect for beginners.
Tin cans are another goldmine for vertical gardening. After enjoying that tomato sauce or soup, clean the cans thoroughly, punch drainage holes in the bottom, and paint them if you’d like a colorful display. Mount them on a wooden pallet or hang them individually using wire. They’re ideal for lettuce, strawberries, or trailing plants like nasturtiums.
PVC pipes deserve special mention for their versatility. Cut lengths of 4-6 inch diameter pipe, drill planting holes along one side, cap the bottom, and mount them vertically or at an angle. Fill with potting mix, and you’ve created a space-efficient tower garden perfect for strawberries or herbs. The smooth interior makes maintenance straightforward.
Perhaps the easiest conversion? Over-the-door shoe organizers! These fabric pockets already have drainage and mounting systems built in. Fill each pocket with soil, and you’ve got 20+ planting spots for shallow-rooted vegetables like lettuce, spinach, or radishes. They’re lightweight, affordable, and removable when needed.
Smart Plant Selection for Vertical Systems
Choosing the right plants can make or break your vertical garden success, but don’t worry—it’s easier than you might think! The key is matching your plants’ natural habits with your vertical structure’s capabilities.
Start by considering weight. Heavier plants like mature tomatoes need sturdy supports, while lightweight herbs and lettuce work beautifully in pocket planters or hanging systems. I learned this the hard way when my first pallet garden collapsed under the weight of waterlogged soil and hefty pepper plants!
Root depth matters tremendously. Shallow-rooted plants like lettuce, spinach, strawberries, and most herbs thrive in containers just 6-8 inches deep, making them perfect for wall-mounted systems. Medium-rooted plants like beans, peas, and cherry tomatoes need 10-12 inches, while deeper systems can accommodate cucumbers and larger vegetables.
For tower gardens and vertical trellises, vining plants are your best friends. Pole beans, peas, cucumbers, and indeterminate tomatoes naturally climb upward, maximizing your space. Trailing plants like nasturtiums, sweet potato vines, and certain strawberry varieties create gorgeous cascading effects in stacked planters.
Water needs deserve attention too. Group plants with similar requirements together—drought-tolerant succulents and herbs like rosemary on upper levels where drainage is faster, and moisture-loving lettuce or spinach lower down. This simple strategy saves water and keeps everyone happy.
When landscaping with edible plants vertically, compact varieties are game-changers. Look for labels saying “patio,” “dwarf,” or “bush” varieties—they’re bred specifically for container growing and limited spaces.
My favorite foolproof picks? Lettuce and salad greens in pocket planters, cherry tomatoes on trellises, herbs everywhere, strawberries in stacked containers, and peas climbing anything vertical. These workhorses rarely disappoint and reward you generously for minimal space investment!
Watering and Maintenance Innovations That Save You Time
DIY Drip Irrigation on a Budget
Keeping your vertical garden thriving doesn’t have to mean expensive irrigation systems or sky-high water bills. I’ve found that simple DIY drip irrigation setups work beautifully and cost next to nothing!
Start with a basic gravity-fed system using a large bucket or food-grade container positioned above your vertical garden. Drill small holes in the bottom or attach inexpensive drip irrigation tubing (available at any hardware store for under $10). Connect the tubing to each planter tier, and you’ve got yourself a reliable watering system. Refill the reservoir weekly, and gravity does the rest.
For an even simpler approach, try the bottle drip method. Save those plastic water bottles! Poke tiny holes in the caps, fill them with water, and insert them upside-down into your planters. They’ll slowly release moisture over several days—perfect for busy schedules or weekend getaways.
Wine bottles work wonderfully too and add a decorative touch! These water-wise irrigation techniques conserve water while ensuring your plants stay consistently hydrated.
Pro tip: Add a timer valve to your bucket system (around $15) for true automation. Your vertical garden will practically water itself, giving you more time to enjoy the fruits—or vegetables—of your labor!
Self-Watering Modifications for Vertical Planters
Let me tell you, one of my biggest vertical gardening breakthroughs came when I discovered self-watering systems. If you’ve ever returned from a weekend away to find your vertical garden looking parched, you’ll appreciate this game-changer!
The basic principle is simple: create a water reservoir at the bottom of your planter and use a wicking material to draw moisture up to the soil as needed. For vertical systems, start by adding a false bottom to your planter—I use an upturned plastic container with drainage holes. This creates space for water to collect underneath while keeping plant roots from sitting in soggy conditions.
Cotton rope, old fabric strips, or specially designed felt wicking material work beautifully to transport water upward. Thread these wicks from the reservoir through your false bottom into the soil layer above. The soil will draw moisture as it dries out, keeping your plants consistently hydrated.
For pocket-style vertical planters, try inserting a perforated PVC pipe vertically through the center, filled with water. Wicks attached to each pocket can draw from this central reservoir. It’s remarkably effective!
I interviewed master gardener Susan Chen, who swears by adding water-absorbing polymer crystals to her potting mix in vertical gardens. “They act like tiny sponges,” she explains, “releasing water slowly between waterings.” This dual approach of wicking and moisture retention can extend watering intervals from daily to every 3-4 days, perfect for busy gardeners.
Common Mistakes to Avoid (And How to Fix Them)
We’ve all been there—excitedly setting up our vertical garden only to face a few hiccups along the way. Don’t worry! These common challenges are completely normal, and with a few simple adjustments, you’ll have your garden thriving in no time.
**Overwatering woes** are perhaps the most frequent issue I see. Those beautiful vertical planters can’t drain excess water as easily as traditional gardens, leading to soggy soil and unhappy roots. If you notice yellowing leaves or musty smells, you’re likely being too generous with the watering can. The fix? Check your soil moisture by sticking your finger about an inch deep—if it feels damp, hold off on watering. Consider adding drainage holes to containers if they don’t have them, and mix perlite or coarse sand into your potting soil to improve drainage.
**Inadequate support structures** often reveal themselves when your thriving plants suddenly start sagging or pulling away from their framework. Prevention is key here! Always overestimate the weight your structure will eventually support—plants get heavier as they grow and retain water. Reinforce your trellis or wall-mounted system with additional brackets or stakes, and don’t hesitate to anchor directly into wall studs for heavier installations.
**Poor plant selection** can dampen anyone’s enthusiasm. Placing sun-loving tomatoes in a shady spot or heavy squash on a lightweight trellis just won’t work. Take time to observe your space throughout the day, noting sunlight patterns, and choose plants accordingly. Lightweight herbs and lettuce work beautifully in pocket planters, while sturdy cucumbers need robust support systems.
Remember, every gardener learns through trial and adjustment—these experiences make you a better grower!
You’ve made it through all these projects, and I hope you’re feeling excited about the possibilities! The beauty of vertical gardening is that you don’t need to tackle everything at once. Start with a single pallet planter or a few hanging pots, and watch how quickly your confidence grows alongside your plants.
There’s something deeply rewarding about looking at a vertical garden you’ve built with your own hands. Every time you harvest fresh herbs from your ladder garden or admire tomatoes climbing your DIY trellis, you’ll feel that special pride that comes from creating something both beautiful and functional. These projects aren’t just about maximizing space—they’re about reconnecting with the joy of growing things and making your garden uniquely yours.
Remember, every experienced gardener started exactly where you are now, with a single seed and a willingness to try. Your first vertical garden doesn’t need to be perfect; it just needs to be started.
We’d love to see what you create! Share photos of your DIY vertical gardens with the Bluestem Gardening community—your projects might inspire someone else to take that first step. So grab your tools, pick a project that speaks to you, and let’s grow upward together!