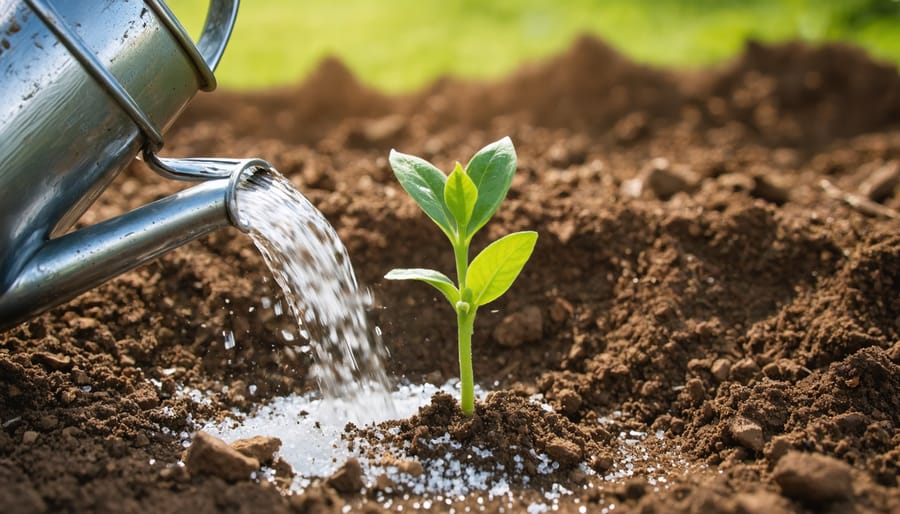
Sandy soil doesn’t have to spell disaster for your garden—in fact, it offers unique advantages once you understand how to work with it. While those fast-draining grains can seem like a gardening challenge, especially when combined with salt accumulation, you’re actually dealing with one of the most improvable soil types.
The secret lies in building what sandy soil naturally lacks: organic matter and water retention. Think of your sand particles as tiny rocks with huge spaces between them—those gaps are where water and nutrients vanish before your plants can use them. By adding 3-4 inches of compost or well-rotted manure twice yearly, you’ll create a sponge-like structure that holds moisture while maintaining the excellent drainage sandy soil provides.
When transforming saline soil that’s also sandy, you’re facing a double challenge, but the solution is surprisingly straightforward. Salt-tolerant plants that thrive in sandy conditions—like Russian sage, sea thrift, and beach rose—can establish quickly while you gradually improve your soil structure.
Your sandy soil journey starts with understanding one fundamental principle: work with what you have, not against it. Mediterranean herbs, native grasses, and drought-tolerant perennials actually prefer these conditions. They’ve evolved to flourish where water drains quickly and roots can spread easily through loose soil. Rather than fighting your soil’s nature, you’ll discover how to select plants that consider sandy conditions an advantage, turning your perceived limitation into a thriving garden reality.
Understanding Your Sandy Saline Soil
What Makes Sandy Soil Different
Sandy soil has a personality all its own, and understanding what sets it apart will help you work with it rather than against it. The key difference lies in particle size. Sand particles are much larger than clay or loam particles, typically measuring between 0.05 and 2 millimeters. Imagine the difference between marbles and flour, and you’ll get the picture.
This larger particle size creates lots of air pockets, which means water drains through sandy soil incredibly fast. While excellent drainage prevents root rot and waterlogging, it also means nutrients wash away quickly before your plants can absorb them. Clay soil, by contrast, holds onto water and nutrients like a sponge, sometimes too much so.
Sandy soil also warms up faster in spring, giving you an earlier start to the growing season. However, it struggles to maintain consistent moisture levels, which can stress plants during hot weather. The loose texture makes it easy to work with and perfect for root vegetables, but it requires more frequent watering and fertilizing than other soil types. Think of sandy soil as having a fast metabolism—everything moves through it quickly, which means you’ll need to feed and water your garden more regularly to keep plants thriving.

How Salt Changes Everything
Sandy soil presents a surprising challenge that catches many gardeners off guard: salt buildup. Because sand drains so quickly, you might think salts would wash away easily. But here’s what actually happens—when water evaporates rapidly from sandy soil, it leaves minerals and salts behind at the surface and around plant roots, creating concentrated pockets that can harm your plants.
Understanding electrical conductivity, or EC, helps you measure this salinity. Think of EC as a simple test that tells you how much salt is dissolved in your soil. Most plants thrive when EC levels stay below 2.0 dS/m, while salt-tolerant varieties can handle readings between 2.0 and 4.0 dS/m. You can pick up an inexpensive EC meter at garden centers to monitor your soil’s salt levels.
When salt accumulates, it creates an unexpected problem with water uptake. Even though your sandy soil might be moist, high salt concentration outside plant roots makes it harder for them to absorb water—like trying to drink through a clogged straw. This explains why plants in salty sandy soil often look wilted despite regular watering. The good news? Once you understand this relationship between sand, salt, and water, you can choose the right plants and adjust your care routine for genuine success.
The Hidden Advantages You Can Exploit
Better Drainage Means Less Salt Buildup
Here’s some encouraging news: sandy soil actually has a built-in advantage when it comes to managing salt. While clay soils tend to trap salts near the root zone where they can cause serious damage, sand’s quick drainage naturally flushes excess salts downward and away from your plants.
Think of it like rinsing a colander versus a bowl. Water moves through sand quickly, taking dissolved salts with it. This is particularly helpful if you’re dealing with saline water for irrigation or live in coastal areas where salt spray is common. Each time you water deeply, you’re essentially giving your soil a cleansing rinse.
To maximize this benefit, water thoroughly but less frequently rather than giving plants frequent shallow drinks. This deeper watering pattern pushes salts below the root zone where they can’t harm your plants. During rainy periods, let nature do the work for you—those good soaking rains provide excellent natural salt-flushing action, resetting your soil conditions and giving your garden a fresh start.
Faster Soil Warming in Spring
Here’s a silver lining that’ll make you smile: sandy soil warms up faster in spring than heavier clay soils, giving you a head start on the growing season! This happens because sand particles don’t hold as much moisture, and that drier soil absorbs the sun’s warmth more quickly. I remember the excitement of planting my tomatoes a full two weeks earlier than my neighbor with clay soil—and enjoying ripe tomatoes sooner, too.
To maximize this advantage, use a soil thermometer to check when temperatures reach the ideal range for your crops. Most warm-season vegetables thrive when soil hits 60-70°F. You can also lay black plastic mulch or landscape fabric over planting beds in early spring to trap even more heat. Just remember that while early planting is tempting, sandy soil can also cool quickly during unexpected cold snaps, so keep row covers handy for protection. This natural head start is one of sandy soil’s best-kept secrets!
Preparing Your Sandy Saline Soil for Planting
Testing Before You Start
Before you dig in, let’s figure out what you’re actually working with. Testing your sandy soil takes just a few minutes and saves you months of frustration down the road.
Start with the simple squeeze test. Grab a handful of moist soil and squeeze it firmly. Sandy soil will crumble apart immediately when you open your hand, while soil with more clay or organic matter holds its shape. If it falls through your fingers like, well, sand, you’ve confirmed what you suspected.
For salinity, you’ll want a basic soil test kit from your local garden center, typically costing around fifteen dollars. Look for an electrical conductivity (EC) reading below 2.0 for most vegetables and flowers. Anything above 4.0 means you’re dealing with serious salt levels that limit your plant choices considerably.
The jar test gives you a visual breakdown of your soil composition. Fill a quart jar one-third full with soil, add water to nearly fill it, shake vigorously, and let it settle for 24 hours. Sand settles first on the bottom, then silt, with clay on top. If sand makes up more than 60 percent of your soil, you’ll need to add organic matter regularly.
Consider professional lab testing if you’re planning extensive gardens or dealing with persistent plant problems. These comprehensive tests, running about forty dollars, reveal nutrient deficiencies and pH levels that home kits might miss.
Building Organic Matter Without Wasting Time
Sandy soil desperately needs organic matter to help it retain moisture and nutrients, but you’ll want to work smarter, not harder. The best approach for improving poor soil conditions is applying 2-4 inches of finished compost twice yearly—once in spring and again in fall. This steady approach beats trying to fix everything at once.
Mulching is your secret weapon here. Apply a 3-4 inch layer of organic mulch like shredded leaves or straw around your plants, keeping it a few inches from stems. As it breaks down, it feeds your soil while preventing moisture loss. Replenish it seasonally.
Cover cropping during off-seasons transforms sandy soil beautifully. Try buckwheat in summer or winter rye in fall. These grow quickly, and when you turn them under, they add precious organic material exactly where you need it.
Skip the quick fixes though. Avoid peat moss alone, as it doesn’t improve sandy soil structure effectively, and steer clear of fresh manure which can burn plants and leach nutrients too quickly through sandy soil.
The Strategic Leaching Method
Here’s a game-changer for sandy saline soil: strategic leaching. This technique uses deep watering to flush accumulated salts down through your soil’s layers, beyond where plant roots grow. Apply about 6 inches of water over a 24-hour period, letting it soak in gradually rather than running off. You’ll know you’ve succeeded when you test the soil moisture at 12 inches deep and find it thoroughly saturated. The best timing? Do this at least two weeks before planting, or during the dormant season for established gardens. If your water is relatively low in salts, one thorough leaching session often does the trick. Think of it as giving your soil a fresh start, washing away the accumulated minerals that have been holding your plants back.
Plants That Actually Thrive Here
Vegetables and Herbs for Your Kitchen
Growing your own fresh produce in sandy soil is absolutely achievable, especially when you choose vegetables and herbs that naturally tolerate these drier, well-drained conditions. The key is selecting varieties that won’t sulk when salt levels fluctuate.
Asparagus thrives in sandy soil and actually prefers it, establishing deep roots that access nutrients other plants miss. Plant crowns in spring, adding compost to the planting trench, and you’ll enjoy harvests for decades. Beets are another winner, developing sweet, tender roots in loose sand within 50-60 days. Keep them consistently watered during germination for best results.
Spinach grows beautifully in cooler months, appreciating the quick drainage sandy soil provides. Sow seeds every two weeks for continuous harvests. For tomatoes, try determinate varieties like ‘Roma’ or ‘Celebrity,’ which handle sandy conditions better than sprawling types. Mulch heavily around plants to retain moisture and regulate soil temperature.
Among herbs, rosemary is practically made for sandy soil. This Mediterranean native actually struggles in heavy, wet conditions but flourishes in fast-draining sand. Plant it in a sunny spot and resist overwatering. Thyme and oregano are equally content in similar conditions, rewarding you with fragrant leaves throughout the season.
Ornamental Plants That Won’t Let You Down
Now for the showstoppers that’ll make your garden the envy of the neighborhood! These ornamental plants don’t just tolerate sandy, salty conditions—they positively thrive in them.
Lavender is your go-to superstar here. Its silvery foliage and fragrant purple spikes love sandy drainage and laugh off salt spray. Plant it along pathways where you’ll brush against it and release that incredible scent. Russian sage offers similar benefits with its airy, cloud-like blooms that dance in coastal breezes.
For something with architectural interest, sea holly brings striking blue flowers and spiky leaves that look almost otherworldly. It’s remarkably tough once established and requires virtually no fussing.
Beach rose deserves special mention—these hardy shrubs produce gorgeous blooms all summer, develop beautiful rose hips in fall, and create natural windbreaks. They spread to form dense colonies, making them perfect for erosion control on slopes.
When planning your drought-tolerant plant selection, consider mixing heights and bloom times. Layer low-growing thyme or sedum as ground covers beneath taller lavender and Russian sage, with beach roses as your backdrop. This creates year-round interest while each plant protects the others from harsh conditions.

Trees and Larger Plants for Structure
When it comes to creating structure in your sandy garden, choosing the right larger plants makes all the difference. These anchors give your landscape visual impact while thriving in challenging conditions.
Tamarisk trees are absolute champions in sandy, saline environments. Their feathery foliage and pink flower plumes add softness while their deep roots stabilize soil beautifully. I’ve seen these graceful trees flourish in coastal gardens where little else survives.
For year-round greenery, oleanders are hard to beat. These Mediterranean natives laugh at sandy soil and reward you with gorgeous blooms from spring through fall. Just remember they need little water once established, making them perfect for low-maintenance landscapes.
Looking for dramatic texture? Pampas grass creates stunning focal points with its towering plumes that dance in coastal breezes. It spreads readily in sandy conditions, so give it room to shine.
In warmer zones, date palms bring instant tropical elegance. Their tolerance for both sand and salt makes them ideal statement plants. Even dwarf varieties like Pygmy Date Palm work wonderfully in smaller spaces.
These structural plants transform sandy gardens from sparse to spectacular, creating the framework around which you’ll build your thriving landscape.
Planting Techniques That Work in These Conditions
The Deep Planting Pocket Method
Here’s a game-changer I learned from a coastal gardener in Florida: creating planting pockets gives your plants a fighting chance in sandy, salty conditions. Think of it as building a custom home for each plant, complete with everything they need to thrive.
Start by digging a hole about twice as wide and deep as your plant’s root ball. Here’s the key part: don’t just plop your plant in and call it a day. Mix the excavated sand with compost, well-rotted manure, or peat moss in a 50-50 ratio. This creates a moisture-holding reservoir that also dilutes salt concentrations.
Before placing your plant, add a 2-inch layer of your enriched mixture at the bottom. Position the plant so its crown sits slightly above ground level (sandy soil settles quickly), then backfill with more of your improved mix. Create a shallow basin around the plant to catch water, then mulch heavily with 3-4 inches of organic material.
Water deeply immediately after planting. This technique essentially creates a buffer zone where roots can establish before venturing into the surrounding challenging conditions. I’ve seen struggling gardens transform using this method.

Timing Your Planting for Success
Timing makes all the difference when working with sandy saline soil. The best planting window is during the rainy season or just before it begins. Why? Rain naturally flushes excess salts deeper into the soil profile, away from your plants’ roots. I’ve found early spring and fall are your golden opportunities in most climates, when rainfall is more abundant and temperatures moderate.
Avoid planting during hot, dry summer months when evaporation draws salts back up to the surface, creating a crusty white layer that can harm tender seedlings. If you must plant in summer, water deeply and frequently to keep pushing those salts downward. Winter planting can work too, especially for hardy vegetables and perennials, as cooler temperatures mean less water evaporation.
Keep an eye on weather patterns in your area. A few consecutive rainy days before planting can dramatically improve your success rate by temporarily reducing salt concentration right when your plants need it most.
Watering Strategy from Day One
Right after planting, give your sandy, saline soil a thorough deep watering to help settle the soil and flush some salts below the root zone. For the first week, water daily but lightly in the early morning to keep roots consistently moist as they establish. Think of this as your plant’s adjustment period – you’re helping it acclimate to its new home while managing that salty challenge.
After week one, gradually shift to less frequent but deeper watering sessions. Sandy soil drains quickly, so you’ll likely need to water every two to three days rather than weekly. Here’s a simple test: stick your finger two inches into the soil – if it feels dry, it’s time to water. These efficient watering strategies prevent salt accumulation near roots while encouraging deeper root growth, making your plants more resilient and self-sufficient over time.
Long-Term Care and Maintenance
Your Seasonal Maintenance Routine
Managing sandy, saline soil is an ongoing dance with the seasons, but don’t worry—once you establish a rhythm, it becomes second nature.
In spring, kick off the growing season by working 2-3 inches of compost into your beds. This replenishes organic matter that winter rains may have leached away and gives your plants a nutrient boost as they wake up. It’s also the perfect time to test your soil’s salt levels if you haven’t recently.
Summer demands vigilance with mulching. Refresh your mulch layer to maintain 3-4 inches of coverage, which keeps moisture in and helps moderate those salt concentrations. I like to add a thin compost layer mid-summer too—it feeds beneficial microbes that continue improving your soil structure.
Fall is your heaviest amendment season. After harvest, spread a generous layer of compost or well-rotted manure and consider planting cover crops like clover. These green manures add organic matter and help bind sandy particles together over winter.
Winter in milder climates is ideal for adding gypsum if needed, as slow winter rains help it work into the soil without shocking your plants. In colder zones, simply let your cover crops do their magic until spring arrives again.
Recognizing and Fixing Salt Stress
Your plants will tell you when salt levels are too high—you just need to know their language. Watch for leaf edges that look burned or brown, stunted growth despite adequate water, or a whitish crust forming on the soil surface. These are clear distress signals that demand quick action.
If you spot these symptoms, flush the affected area immediately with plenty of fresh water. This helps push salts deeper below the root zone, giving your plants breathing room. Do this early morning or evening to maximize water penetration. You might need to repeat this process several times over a few weeks, especially after discovering the problem.
Prevention is always easier than cure. Test your soil regularly—at least twice yearly if you’re dealing with naturally saline conditions. Maintain a thick layer of organic mulch to reduce evaporation that draws salts upward. Consider installing drip irrigation to provide consistent, deep watering that keeps salts moving downward rather than concentrating at the surface.
If salt accumulation becomes persistent, you may need comprehensive strategies for reviving saline soil that address underlying drainage or water quality issues affecting your garden’s long-term health.
Real Gardener Success Story
When Maria Rodriguez moved to her coastal property in Southern California five years ago, she faced what seemed like an impossible gardening challenge. Her backyard was essentially a beach—pure sand with a noticeable salt crust after each rain.
“I’d walk out there and think, nothing’s ever going to grow here,” Maria laughs. “My neighbors had mostly given up and covered everything with gravel. But I grew up with my grandmother’s lush garden, and I wasn’t ready to quit.”
Maria started small, focusing on a 10-by-10-foot area near her patio. Her first step was adding three inches of compost mixed with aged manure, working it thoroughly into the top layer of sand. She also installed a simple drip irrigation system to keep moisture consistent without wasting water.
“The game-changer was choosing the right plants,” she explains. “I started with Russian sage, lavender, and society garlic—plants that actually like these conditions. Within six months, they were thriving.”
Encouraged by her initial success, Maria gradually expanded her garden. She discovered that her sandy soil actually offered advantages, particularly excellent drainage for Mediterranean herbs. Today, her property features rosemary hedges, colorful ice plants cascading over borders, and even productive tomato plants in raised beds filled with her improved soil mix.
“My biggest lesson? Work with your soil, not against it,” Maria advises. “I still add compost twice a year, but I’ve learned to love what I have. My lavender grows bigger here than my sister’s does in regular soil. Some days I can’t believe this is the same bare sand I started with.”
Her transformation took patience, but Maria’s garden now inspires her entire neighborhood.
You’ve got everything you need to transform your sandy, saline soil into a thriving garden space. Yes, it takes a bit more attention than typical garden soil, but remember—you’re not fighting against your soil, you’re working with its unique qualities. The plants we’ve discussed are naturally adapted to these conditions, and with the right amendments and care practices, they’ll flourish in ways that might surprise you.
Let’s recap your key steps forward: enrich that sandy soil with organic matter to improve water retention, choose salt-tolerant plants that actually enjoy these conditions, mulch generously to protect and nourish, and water deeply but less frequently to encourage strong root systems. Each small action builds on the last, creating a sustainable garden ecosystem that gets easier to maintain over time.
The beauty of gardening in challenging conditions is that your successes feel even sweeter. Every thriving lavender plant, every productive tomato vine, proves that with the right approach, limitations become opportunities for creativity and growth.
Now it’s your turn to get started. Begin small if you need to—maybe with a few proven performers like rosemary or Russian sage—and expand as you gain confidence. We’d love to hear how your sandy soil garden journey unfolds. What plants have worked best for you? What unexpected challenges or victories have you experienced? Share your story in the comments below and join our community of gardeners who are proving every day that great gardens can grow anywhere.