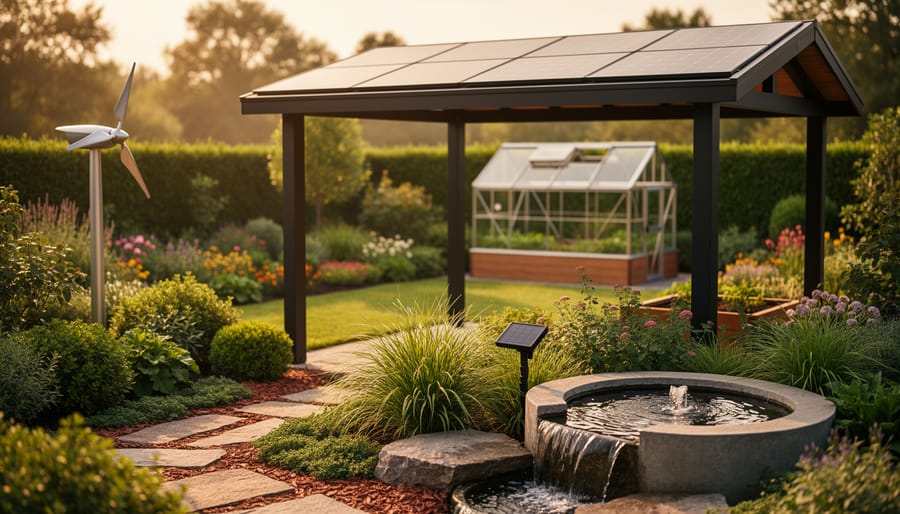
Integrating renewable energy into your garden is easier than you think. Solar panels, wind turbines, and hydroelectric systems can power lighting, water features, irrigation pumps, and even small greenhouses, transforming your outdoor space into a self-generating ecosystem that cuts electricity costs while supporting a self-sustaining garden. The good news? You can start small with plug-and-play solar lights and scale up to grid-tied systems as your confidence grows.
Most gardeners begin with solar because installation requires no electrical expertise. A basic solar path light kit takes minutes to set up, while a complete solar irrigation system might need a weekend and some planning. Wind turbines work brilliantly in open, breezy plots but demand careful placement and anchoring. Small-scale hydroelectric setups are rare gems, perfect if you have a stream or significant slope on your property.
The benefits go beyond lower utility bills. Renewable systems offer energy independence during outages, reduce your carbon footprint, and add real value to your property. They’re particularly valuable for remote garden sheds, ponds far from outlets, and areas where trenching electrical lines would destroy established beds.
This guide walks you through everything from choosing the right renewable source for your site conditions to installing systems safely and verifying they perform as expected. Whether you’re adding a single solar fountain or planning a comprehensive energy setup for your entire garden, you’ll find clear steps matched to your skill level and realistic timelines for each project.
Why Renewable Energy Belongs in Your Garden
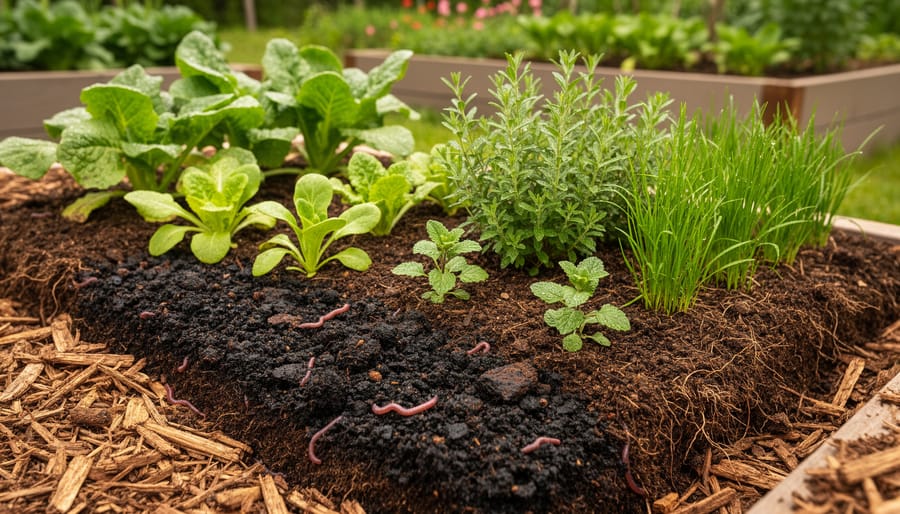
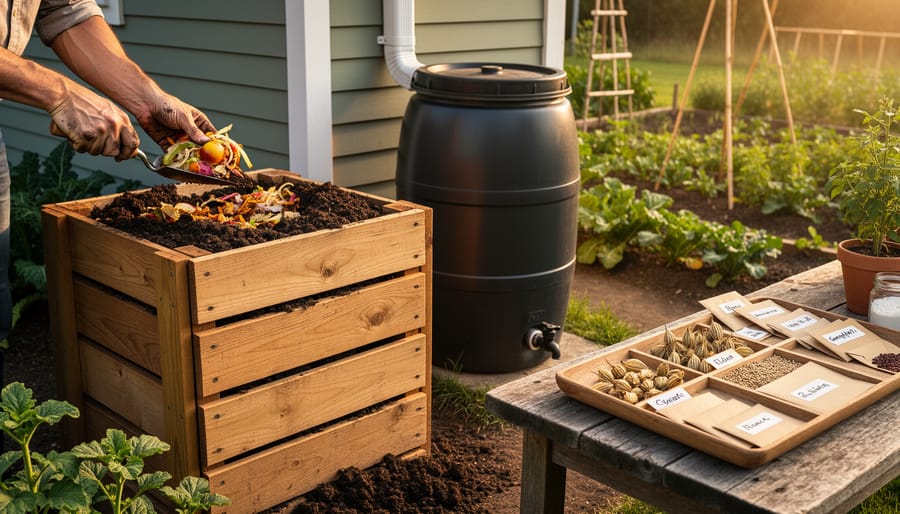
Your garden already embodies sustainability, composting kitchen scraps, collecting rainwater, choosing native plants. Renewable energy is the natural next step in this progression, transforming your outdoor space into a truly self-reliant ecosystem that generates its own power.
The financial argument is straightforward. Solar-powered garden lighting eliminates the need for trenching expensive electrical lines to distant corners of your property. A solar fountain pump runs without adding a penny to your monthly utility bill. While quality renewable components require upfront investment, they typically pay for themselves within three to five years through eliminated electricity costs. After that, you’re essentially generating free power for decades, most solar panels carry 25-year warranties.
Energy independence matters more than many gardeners initially realize. Your pond aerator keeps running during power outages. Pathway lights illuminate without relying on your home’s electrical system. You can install water features in locations where running conventional power would be prohibitively expensive or impossible. This freedom to place garden elements wherever they work best, not where electrical access dictates, opens up creative possibilities.
The environmental impact speaks to why most of us garden in the first place. Solar panels generate clean electricity without emissions, noise, or fuel consumption. You’re demonstrating that beautiful, functional outdoor spaces don’t require fossil fuels. Neighbors notice solar-powered features, sparking conversations about sustainable choices that extend beyond your property line.
Property value receives a measurable boost too. Real estate studies consistently show that well-executed sustainable features, including renewable energy installations, appeal to environmentally conscious buyers and can increase home valuations by 3-5 percent. You’re not just improving your garden, you’re making a smart investment in your property’s future.
Planning Your Renewable Energy Garden Layout
Before you install a single solar panel or wire up a garden light, invest time in thoughtful planning. A well-designed renewable energy garden layout saves money, prevents frustration, and ensures your systems actually meet your needs.
Start by auditing your garden’s current and planned energy demands. Walk through your space and note everything that requires power: how many pathway lights do you envision? Will you run a pond pump continuously or just during daylight hours? Do you want to charge cordless tool batteries in your shed? Write down each feature and estimate its wattage, most devices list this on their labels or in product specifications. This inventory reveals whether you need modest solar lighting or a more robust system with battery storage.
Next, observe your property’s renewable energy potential through different seasons and weather conditions. Spend a few days tracking which areas receive direct sunlight from morning through afternoon, noting any shade from trees, buildings, or fences that shifts throughout the day. South-facing spots in the Northern Hemisphere (north-facing in the Southern Hemisphere) typically capture the most sun. If you’re considering wind power, watch how air moves through your garden during different weather patterns, though most residential gardens lack consistent wind for effective turbine operation.
Your climate-proof planning should account for these essential considerations:
- Complete energy audit listing every garden feature you want to power, with estimated wattage
- Sun exposure mapping showing which areas receive six-plus hours of direct sunlight daily
- Local zoning requirements and homeowner association rules regarding solar installations
- Realistic budget allocation covering panels, mounting hardware, batteries, and installation supplies
- Aesthetic integration ensuring renewable systems complement rather than clash with your garden design
Finally, match renewable sources to your specific situation. A shaded woodland garden won’t support solar panels effectively, but a sun-drenched cottage garden is perfect. Budget matters too: solar pathway lights cost $20-$50 each for quality units, while a comprehensive system powering multiple features runs $500-$2,000 or more. Start with high-impact, simple projects and expand as you gain confidence and funds.
Tools and Materials You’ll Need
Your renewable energy garden needs three categories of supplies: the energy-generating equipment itself, the components that manage and store power, and the installation tools.
Energy Generation Equipment
For most gardeners, solar is the starting point. Simple solar garden lights come as complete units, no assembly required. If you’re powering water features or larger systems, you’ll need standalone solar panels. Look for panels rated between 10-50 watts for typical garden applications, with tempered glass rather than plastic surfaces for longevity. Small residential wind turbines (400-1000 watts) suit properties with consistent wind above 10 mph, but check local ordinances first since height restrictions often apply.
Power Management and Storage Components
Battery storage lets your garden features run after sunset. Deep-cycle batteries designed for solar applications (AGM or lithium) outlast car batteries significantly. A charge controller sits between your solar panel and battery, preventing overcharging damage, PWM controllers work fine for small systems under 200 watts, while MPPT controllers extract more power from larger arrays. You’ll also need weatherproof junction boxes to protect connections from moisture.
Essential Installation Tools and Safety Gear
- Wire strippers, crimping tool, and voltage tester for electrical work
- Cordless drill with masonry and wood bits for mounting hardware
- Adjustable wrench set and screwdriver assortment for assembly
- Cable ties, waterproof wire connectors, and outdoor-rated electrical tape
- Safety glasses, work gloves, and insulated tools for electrical tasks
- Ladder or stepladder for installing elevated panels (ensure stable footing)
- Multimeter for testing voltage and current output during setup
Quality matters more than quantity here. Weatherproof components rated IP65 or higher resist rain and dust. Marine-grade wiring withstands outdoor conditions better than standard electrical wire. For mounting hardware, stainless steel or galvanized brackets won’t rust, keeping your panels secure through seasons of weather exposure.
Safety First: What You Must Know Before Starting
Before you install any renewable energy equipment, understanding basic safety protocols can prevent serious injury and property damage. Unlike passive garden projects, working with solar panels, batteries, and electrical components introduces real risks if handled improperly.
Start by checking your local building codes and permit requirements. Many municipalities require permits for permanent solar installations, even for garden structures, and inspections ensure your setup meets safety standards. The permitting process also verifies that solar array orientation matters for both efficiency and code compliance. Don’t skip this step, unpermitted work can create insurance headaches and complicate future property sales.
Electrical safety basics apply even to low-voltage garden systems. Keep all connections dry and use weatherproof junction boxes rated for outdoor use. Proper grounding prevents shock hazards, connect metal frames and mounting hardware to ground rods following manufacturer specifications. When working with battery storage, understand that batteries can deliver dangerous current levels even at 12 or 24 volts. Wear safety glasses and gloves, work in ventilated areas, and never create sparks near batteries.
Weather matters more than you might think. Never install equipment during rain, snow, or high winds. Wet conditions create electrocution risks, and wind can turn large solar panels into dangerous sails. Similarly, keep water features and electrical components properly separated, pumps should have GFCI protection, and panel connections must stay above potential flood levels.
Know your limits. Simple solar light installations are genuinely DIY-friendly, but anything involving permanent wiring, battery banks over 200 watts, or rooftop mounting warrants professional installation. Licensed electricians understand code requirements and can spot hazards you might miss.
Step-by-Step: Installing Solar-Powered Garden Features
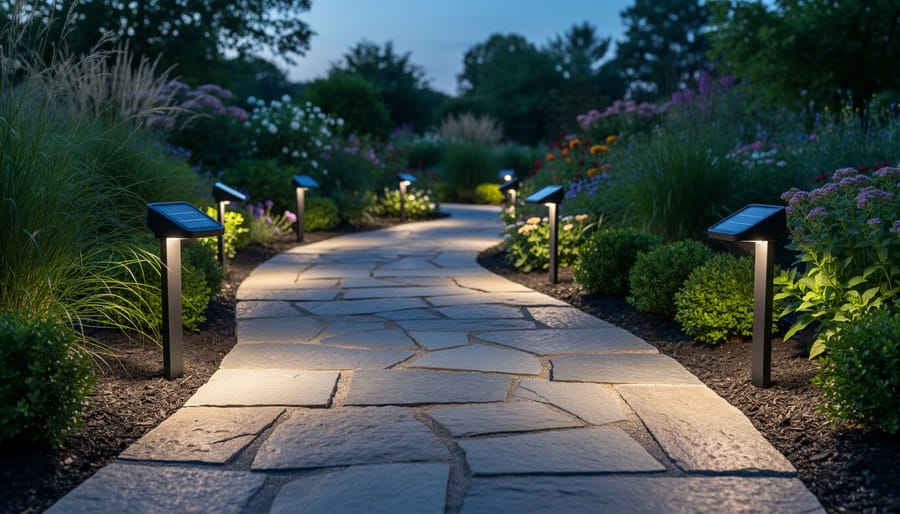
Step 1: Start Simple with Solar Garden Lighting
Solar pathway lights offer the perfect starting point for your renewable energy garden, no wiring, no electrician, and you’ll see results the first night.
Choose spots that receive at least six hours of direct sunlight daily. Morning sun works fine, but afternoon exposure typically delivers stronger charging. Avoid placing lights under tree canopies or eaves where shadows block the panels.
For pathway lighting, space fixtures 6 to 8 feet apart for consistent illumination without wasteful overlap. Mark your positions first using stakes, then walk the path after dark to verify coverage before committing to installation.
Most solar lights need only 2 to 3 inches of soil penetration for stability. Push the stake firmly into softened ground, water the area beforehand if your soil runs hard. The solar panel should face south (or north in the Southern Hemisphere) and sit level, not tilted by uneven ground.
Give new lights two full sunny days to charge completely before judging their performance. Dim output usually means insufficient sunlight rather than defective units, so relocate any underperformers to brighter spots. Clean the panels monthly with a damp cloth; dust and pollen cut charging efficiency by half.
Step 2: Power Water Features with Solar Pumps
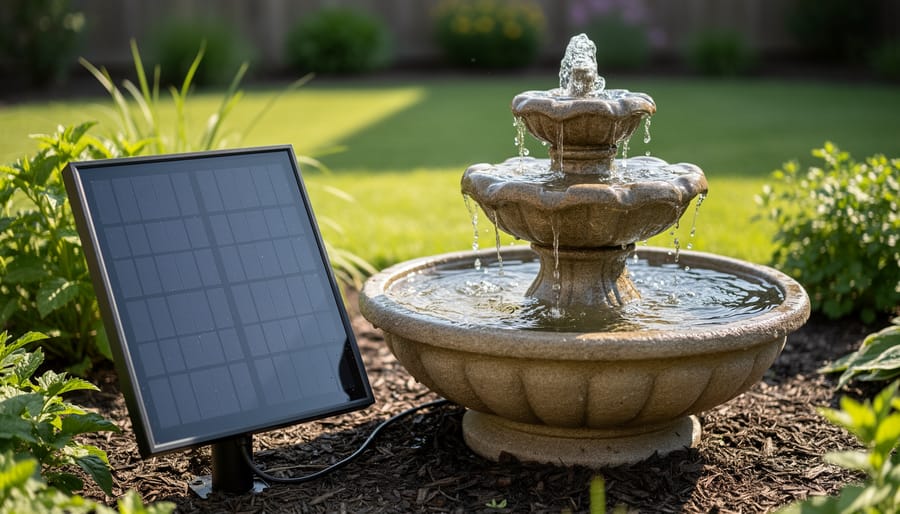
Solar-powered pumps transform stagnant ponds into lively water features without trenching cables across your garden. Start by choosing a pump rated for your feature’s size, small fountains need 5-10 watts, while larger ponds might require 20-50 watts. Check the pump’s maximum lift height matches your fountain or waterfall design.
Position the solar panel where it’ll receive unobstructed sunlight for at least six hours daily, typically south-facing in the Northern Hemisphere. Most kits include a detachable panel with a cable, letting you place the panel in full sun while the pump sits in shade. Secure the panel to a stake, wall mount, or floating platform.
Submerge the pump at the recommended depth, usually 6-12 inches below the surface, and anchor it to prevent tipping. Thread the waterproof cable carefully, avoiding kinks that restrict water flow. Connect the panel to the pump following the manufacturer’s polarity markers; reversed connections won’t damage modern pumps but they won’t run either.
Fill your feature and watch it spring to life as sunlight hits the panel. The flow rate will vary with sun intensity, creating a dynamic display that’s strongest at midday. For consistent evening operation, add a battery backup kit.
Step 3: Set Up Solar Panels for Garden Structures
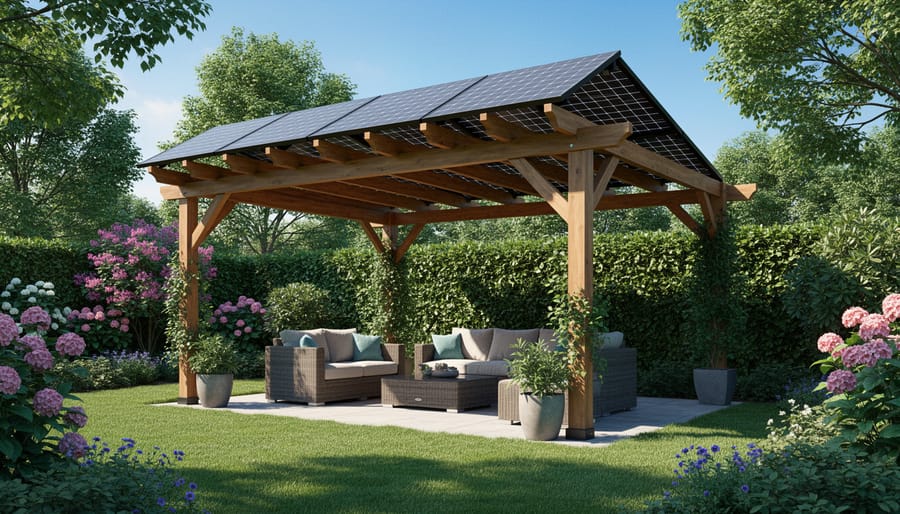
Once you’ve mastered simple solar features, mounting panels on garden structures opens up possibilities for powering more demanding systems like irrigation controllers, greenhouse fans, or tool-charging stations. The key is choosing a location with unobstructed southern exposure (or northern in the Southern Hemisphere) and a sturdy surface that can support the panels’ weight.
Start by measuring your structure’s roof or wall to determine how many panels will fit. Most garden-scale panels measure about 65 by 39 inches and weigh 40 pounds each. Pergolas and sheds work perfectly if they receive at least six hours of direct sunlight daily. Use a mounting rail system designed for your structure type, adjustable frames let you tilt panels to the optimal angle, which equals your latitude for year-round performance (steeper in winter, shallower in summer if you adjust seasonally).
Secure the rails with lag bolts into rafters or beams, never just sheathing. Apply weatherproof sealant around all penetrations to prevent leaks. Attach the panels using the manufacturer’s clamps, ensuring they’re tight enough to withstand wind but not overtightened.
Run weatherproof cables from the panels down to your charge controller location, using conduit to protect against UV damage and rodents. Connect the controller to your battery bank first, then attach the solar panel wires, never reverse this order or you’ll risk damaging the controller. Mount the controller in a shaded, ventilated spot since heat reduces efficiency. Double-check all connections are secure before switching on the system.
Step 4: Connect Battery Storage for Nighttime Use
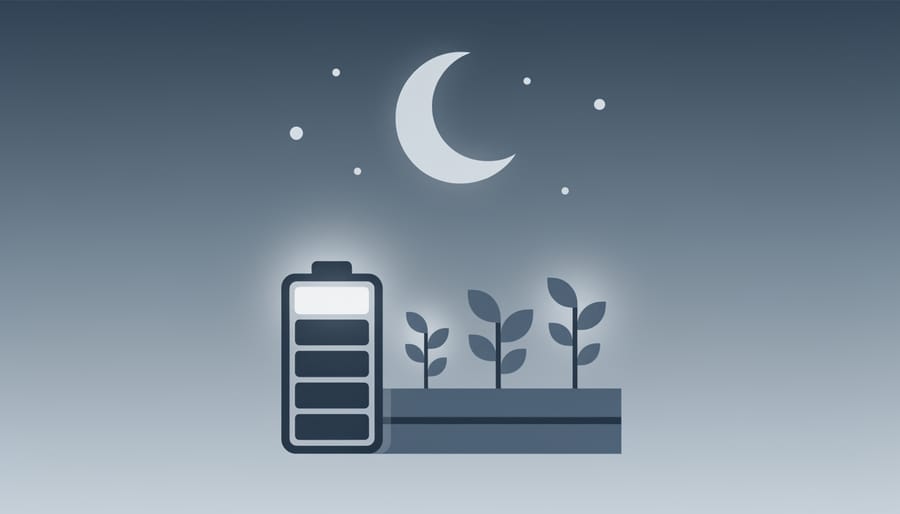
Installing battery storage lets your solar-powered water features and lights keep running after sunset. Choose a deep-cycle battery rated for outdoor use, sealed lead-acid or lithium batteries work well for garden applications. Position the battery in a weatherproof enclosure near your solar panels, protecting it from direct rain and extreme temperature swings.
Connect your solar panels to the battery through a charge controller, which prevents overcharging during sunny days and protects against complete discharge at night. Match the controller’s voltage to your battery (typically 12V for garden systems). Wire the positive terminal first, then negative, using weatherproof connectors rated for outdoor electrical work.
Check battery voltage monthly with a multimeter. Most garden batteries perform best when kept between 50-80% charge. Clean terminals twice yearly and replace batteries every 3-5 years depending on use intensity.
Adding Small Wind Turbines to Your Garden
Wind turbines might seem appealing for garden energy generation, but they’re only practical if your location genuinely supports them. Most garden wind turbines need average wind speeds of at least 10-12 mph to produce meaningful power, and they perform best when mounted higher than surrounding obstacles. Before purchasing anything, spend time observing your garden’s wind patterns. Notice whether trees, buildings, or hills block prevailing winds, and consider whether your area experiences consistent breezes or only occasional gusts.
If your site checks out, choose a small vertical-axis wind turbine (VAWT) rated between 100-400 watts for garden applications. These models handle turbulent winds better than horizontal-axis designs and work in tighter spaces. Installation demands sturdy mounting, either a pole foundation set at least 3 feet deep in concrete or brackets anchored to a solid structure like a shed. Height matters tremendously: mounting your turbine 10-20 feet above ground level and at least 10 feet higher than nearby obstructions makes the difference between trickle charging and practical power generation.
Set realistic expectations from the start. Unlike solar panels that deliver predictable daily output, wind turbines produce intermittently based on weather conditions. They won’t replace solar as your primary garden power source but can supplement it during overcast periods when you have good wind. Most gardeners find that wind complements solar rather than competing with it, creating a more resilient renewable energy system for their outdoor spaces.
Testing and Verifying Your Installation
After completing your installation, verifying that everything works properly prevents frustration and ensures you’re getting the power you expected. Testing should happen in stages, not all at once.
Start by checking individual components. For solar panels, use a multimeter to measure voltage output during midday sun, most panels should produce close to their rated voltage in direct sunlight. If readings fall significantly short, check for shading, dirty panels, or loose connections. Water features powered by solar pumps should operate within minutes of panel exposure; if they sputter or stop, the pump intake might be clogged or the panel isn’t receiving enough light.
Battery systems require closer attention. A charge controller should display charging status when sun hits the panels and show voltage readings that match your battery specifications. Batteries that won’t hold a charge may have faulty connections or might be incompatible with your system’s voltage requirements.
Follow this verification sequence over your first week:
- Test during peak sun hours (10 AM to 2 PM) to confirm maximum power output from panels
- Verify nighttime operation of battery-powered features to ensure adequate storage capacity
- Check all connections for tightness and weatherproofing, looking for exposed wire or moisture
- Monitor system performance daily for the first week, noting any power drops or irregularities
- Adjust panel angles if needed based on actual performance versus expected output
Weatherproofing inspection matters more than most gardeners realize. Water infiltration causes most renewable energy failures. Examine every connection point, junction box, and wire entry for proper sealing, silicone sealant should be intact without cracks. If lights flicker or pumps operate inconsistently, trace the problem systematically from panel to component rather than assuming equipment failure. Often the issue is a corroded connection or partially shaded panel, both easily remedied once identified.
Expert Insight: Interview with Sustainable Landscape Designer Maria Chen
I’ve been designing sustainable landscapes for fifteen years, and renewable energy has transformed how we approach garden functionality. My most rewarding project integrated solar-powered irrigation with native plantings and resilient garden systems that now thrive with minimal intervention. The homeowner powers their entire outdoor space, lighting, water features, tool charging, from panels tucked onto a pergola roof.
What’s the biggest mistake you see beginners make?
Overcomplicating their first installation. Start with one solar-powered element that solves a real problem, pathway lighting or a fountain pump. Master that before adding complexity.
Your advice for someone just starting out?
Map your garden’s sun exposure before buying anything. I’ve seen people install panels in shaded spots, then wonder why nothing works. Walk your garden at different times throughout the day, note where sunlight hits consistently, and design around those spots.
What excites you about renewable energy in gardens for 2026?
The technology keeps getting more affordable and efficient. We’re seeing beautiful solar panel designs that don’t scream “tech”, they blend into garden structures naturally. Battery storage has improved dramatically, making nighttime operation reliable. I’m also excited about micro wind turbines designed specifically for residential gardens, they’re quieter and more effective than earlier models.
The intersection of renewable energy and garden design isn’t futuristic anymore. It’s practical, accessible, and creates genuinely self-sufficient outdoor spaces that perform beautifully year-round.
Maintaining Your Renewable Energy Garden Systems
Your renewable energy garden systems need regular care to perform efficiently, but the maintenance is straightforward and takes only a few hours each season. Most tasks are simple visual inspections and basic cleaning that any gardener can handle.
Solar panels accumulate dust, pollen, and bird droppings that reduce their efficiency by up to 25 percent. Clean them three to four times yearly using a soft cloth or squeegee with plain water, avoid abrasive cleaners that scratch protective coatings. Early morning or evening cleaning prevents thermal shock on warm panels.
Battery health determines how well your system stores energy for nighttime use. Check battery terminals monthly for corrosion (white or green buildup) and clean with a wire brush if needed. Most sealed lead-acid batteries last three to five years, while lithium batteries can reach ten years with proper care. Monitor voltage levels with an inexpensive multimeter; readings consistently below manufacturer specifications signal replacement time.
Wiring faces constant weather exposure. Inspect connections quarterly for frayed insulation, loose fittings, or water infiltration in junction boxes. Tighten any connections that have worked loose from temperature cycling. Replace damaged wiring immediately to prevent system failure or safety hazards.
- Spring: Clean panels after pollen season, inspect wiring for winter damage, check battery terminals
- Summer: Verify panels are debris-free, ensure batteries aren’t overheating in direct sun, test system performance during peak sunlight
- Fall: Clean panels before winter, adjust angles for lower sun position, check weatherproofing on all connections
- Winter: Remove snow from panels after storms, monitor battery performance in cold temperatures, bring portable components indoors in extreme cold
In cold climates, some batteries lose capacity below freezing. Consider insulated battery boxes or moving batteries to a shed during winter months. Disconnect and store small solar lights and fountains before the first hard freeze to prevent cracking.
Keep a simple maintenance log noting cleaning dates, battery voltage readings, and any repairs. This record helps you spot declining performance early and plan component replacements before complete failure disrupts your garden’s power supply.
What to Do Next: Expanding Your Renewable Garden
Once your renewable energy system runs smoothly, you’re ready to expand. Start by adding more features to existing circuits, string additional solar lights along new pathways, or upgrade to higher-capacity panels that power multiple water features simultaneously.
Smart controls transform basic installations into sophisticated systems. Wi-Fi-enabled timers let you schedule lighting from your phone, while soil moisture sensors paired with solar-powered irrigation create responsive watering systems that work with regenerative soil building efforts.
Greenhouse owners can integrate solar panels with heating cables or ventilation fans, extending growing seasons without grid dependency. Set up a dedicated charging station with multiple USB ports and standard outlets to power pruners, leaf blowers, and other cordless tools, no more extension cords snaking across the lawn.
Connect with fellow renewable energy gardeners through online forums, local sustainability groups, and garden club networks. These communities share installation tips, troubleshoot problems, and inspire new projects. Many organize garden tours where you’ll see creative implementations firsthand, sparking ideas for your next upgrade.
Common Questions About Renewable Energy in Gardens
Starting with renewable energy in your garden doesn’t require a massive investment. You can dip your toes in for under $50 with a set of quality solar pathway lights, while a more comprehensive setup with solar panels, battery storage, and multiple powered features might run $500-$2,000 depending on your ambitions. The beauty of renewable energy gardens is that you can start small and expand over time as your budget allows.
How much does it cost to get started?
Basic solar lighting starts around $30-$50, solar water features run $75-$200, and more advanced panel systems with battery storage typically cost $500-$2,000 for garden-scale installations.
Can I power my entire garden with solar?
Yes, but it depends on your energy needs. Solar easily handles lighting, water features, and small pumps. Larger demands like greenhouse heating or tool charging require more panels and battery capacity but are entirely feasible.
What happens on cloudy days?
Solar systems still generate power on overcast days, just at reduced capacity, typically 10-25% of full output. Battery storage bridges the gap, storing excess energy from sunny days to power features when sunlight is limited.
Do I need permits for garden renewable energy?
Simple plug-and-play solar lights and small water features rarely need permits. Larger installations with mounted panels or grid-tied systems usually require electrical permits and inspections, check with your local building department before starting.
How long do solar panels last?
Quality solar panels typically carry 25-year warranties and often function well beyond that. Battery life varies more widely, with lead-acid batteries lasting 3-5 years and lithium options pushing 10-15 years with proper care.
Is it worth it for small gardens?
Absolutely. Even compact spaces benefit from solar accent lighting or a small fountain. The initial investment pays for itself through eliminated electricity costs, and the environmental benefit applies regardless of garden size.
One concern I hear frequently is whether renewable systems can handle winter conditions. Modern solar equipment is built for year-round outdoor use, though snow coverage temporarily stops production until you clear the panels. Battery performance does drop in extreme cold, but quality charge controllers compensate by adjusting charging parameters.
The return on investment matters to most gardeners. Solar lighting typically breaks even in 2-3 years compared to wired alternatives when you factor in installation costs and ongoing electricity use. Larger systems take longer, perhaps 5-8 years, but they add genuine value to your property while giving you energy independence for your outdoor space.
Starting your renewable energy garden journey doesn’t require a massive investment or expert knowledge. Whether you’ve installed a few solar pathway lights or built a comprehensive system powering multiple features, you’ve taken a meaningful step toward energy independence and environmental stewardship.
The beauty of renewable energy in garden design is its scalability. Your first solar fountain can grow into a network of powered features over time, expanding as your confidence and budget allow. Each addition reduces your environmental footprint while creating a more functional, self-sufficient outdoor space that genuinely reflects your values.
Remember that your garden is a living laboratory. Experiment with different solar placements, try new features, and don’t hesitate to adjust your setup based on what works. The renewable energy gardening community is welcoming and eager to share experiences, your successes and challenges can help fellow gardeners on their own journeys.
Your sustainable garden represents more than just reduced electricity bills. It’s a daily reminder that beautiful spaces and responsible choices go hand in hand, proving that environmental consciousness enhances rather than limits our enjoyment of the outdoors.