Your garden is already a wildlife sanctuary—now it’s time to capture the magic happening right outside your window. You don’t need a safari or expensive telephoto lenses to photograph stunning wildlife; those chickadees at your feeder, the monarch butterflies visiting your coneflowers, and the squirrels raiding your bird bath are perfect subjects waiting for their close-up.
Wildlife photography might seem intimidating, but the same principles that apply to garden photography fundamentals work beautifully for capturing animals too. The key difference? Your subjects won’t hold still while you fiddle with settings, which makes preparation essential.
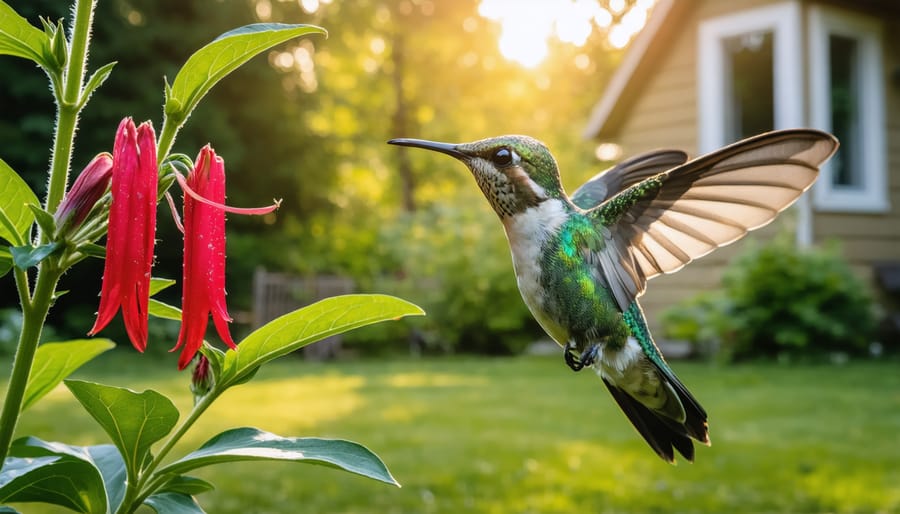
This guide strips away the complexity and focuses on what actually works in a garden setting. You’ll learn how to use the camera you already own—whether that’s a smartphone, a basic point-and-shoot, or an entry-level DSLR—to photograph the wildlife your garden attracts. We’ll cover the simple camera settings that freeze a hummingbird’s wings, the best times of day when wildlife is most active and lighting is ideal, and clever garden design tweaks that bring animals closer to your lens.
More importantly, you’ll discover how patience and observation matter far more than expensive equipment. Understanding animal behavior—like knowing where that robin always perches or when the bees visit your lavender—turns you from a frustrated shutter-clicker into a wildlife photographer who consistently captures compelling images.
Why Your Garden is the Perfect Wildlife Photography Studio
Before you pack your camera bag for distant wildlife reserves, take a moment to look out your window. That patch of green right outside your door? It’s already an incredible wildlife photography studio, and you don’t even need to leave home to use it.
Your garden offers something professional wildlife photographers spend years developing: intimate knowledge of your subjects’ behavior. You’ll quickly learn which birds visit the feeder at dawn, where butterflies prefer to land on sunny afternoons, and which corner the rabbits favor at dusk. This familiarity is pure gold when you’re trying to capture that perfect moment.
Unlike remote locations, your garden allows unlimited practice sessions. Forgot to adjust your shutter speed? Simply head back inside, review your shots, and return ten minutes later. Weather not cooperating? Grab a coffee and wait it out in comfort. This convenience means you’ll actually practice regularly—the secret to improving any skill. You can even experiment with your garden photo studio setup, testing different backgrounds and lighting conditions throughout the day.
Gardens naturally attract diverse wildlife year-round. Spring brings nesting birds and emerging butterflies. Summer buzzes with pollinators visiting your flowers. Autumn draws migrating species and squirrels gathering provisions. Even winter offers opportunities with frost-hardy birds and the occasional fox. Each season presents new subjects and storytelling possibilities.
The real magic? Your garden becomes more photogenic as you tend it. Plant native flowers to attract butterflies, add a water feature for bathing birds, or let a corner grow wild for ground-dwelling creatures. You’re not just improving your photography skills—you’re creating a thriving ecosystem that rewards both your camera and your conservation efforts.
Essential Equipment to Get Started
Camera Options That Won’t Break the Bank
You don’t need to spend thousands of dollars to capture stunning photos of the birds and butterflies visiting your garden! Let’s explore camera options that fit a beginner’s budget while still delivering quality results.
**Entry-Level DSLRs and Mirrorless Cameras** offer excellent value, with models starting around $400-600. Look for cameras with fast autofocus systems—this feature matters most when photographing quick-moving hummingbirds or darting butterflies. A camera that shoots at least 5 frames per second helps you capture that perfect moment when a cardinal lands on your feeder.
**Zoom Capability** is your friend in wildlife photography. A lens with 200-300mm reach lets you photograph shy creatures from a comfortable distance without disturbing them. Many starter kits include an 18-55mm lens, but consider investing in a budget telephoto lens (around $200-300) as your next purchase.
**Don’t Overlook Your Smartphone!** Modern phones have impressive cameras that work beautifully for garden wildlife photography. I’ve captured gorgeous butterfly shots using just my phone by moving slowly and using the zoom sparingly to avoid graininess. The key is getting closer—which your garden environment makes possible—rather than relying on digital zoom.
Lenses That Make the Difference
Your lens choice truly makes or breaks wildlife photography, but here’s the good news—you don’t need to break the bank to get started! For photographing the birds, butterflies, and critters visiting your garden, you’ll want a telephoto lens that lets you capture intimate details without getting too close and disturbing your subjects.
Think of focal length as your zoom power. A 200-300mm lens gives you that sweet spot for backyard wildlife photography, allowing you to fill the frame with a cardinal at your feeder from a comfortable distance. Many beginners start with affordable zoom lenses like a 70-300mm, which offers versatility as you learn what subjects capture your heart most.
If you’re using a smartphone or point-and-shoot camera, don’t worry! Many newer models have impressive zoom capabilities. I’ve seen stunning hummingbird photos taken with phones paired with clip-on telephoto adapters.
The key is maintaining enough distance that your garden visitors behave naturally. When birds aren’t nervous about your presence, they’ll display those magical moments—preening their feathers, feeding their young, or catching insects mid-flight. A good telephoto lens becomes your quiet observation tool, turning your garden into a photography blind where wildlife simply goes about their beautiful, everyday lives.
Helpful Accessories for Garden Shoots
A few simple accessories can transform your garden wildlife photography without breaking the bank. A sturdy tripod is invaluable when waiting for that perfect bird to land at your feeder—it eliminates camera shake and lets you relax between shots rather than holding your camera for long stretches. I’ve found that even an inexpensive tripod makes a noticeable difference in image sharpness, especially in lower light conditions during early morning or dusk.
If you’re moving around your garden frequently, consider a monopod instead. It offers stability while keeping you mobile enough to follow a butterfly from flower to flower. Remote shutters or your camera’s self-timer help capture skittish subjects since they eliminate the slight movement caused by pressing the shutter button. Many newer cameras even offer smartphone apps that let you trigger shots remotely—perfect for photographing shy birds from a comfortable distance. Don’t forget a simple lens cloth in your pocket; garden photography means encountering dew, pollen, and the occasional splash from the sprinkler!
Creating a Wildlife-Friendly Garden Environment
Plants That Attract Your Best Subjects
Transform your garden into a wildlife photography studio by choosing plants that naturally draw your subjects closer. For birds, I’ve had wonderful success with native berry-producing shrubs like elderberry and serviceberry—they’re absolutely irresistible! Add coneflowers and black-eyed Susans to attract goldfinches who love the seeds.
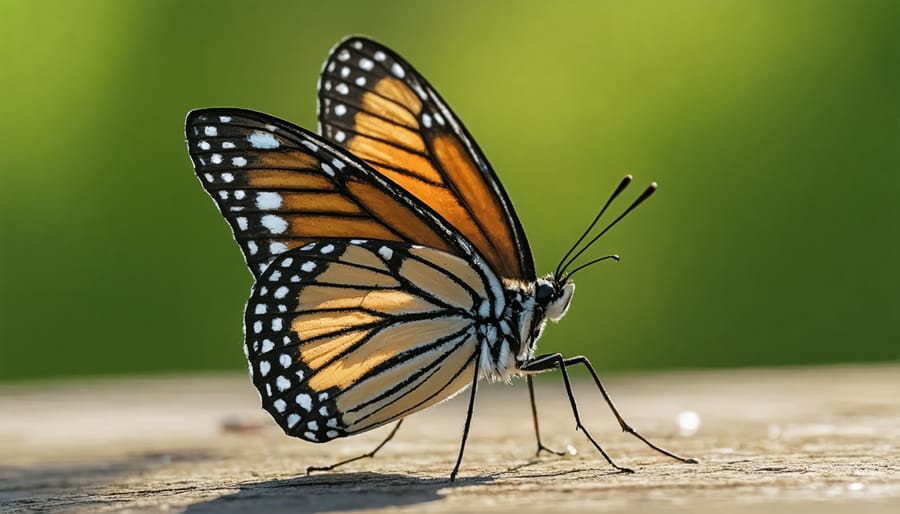
Butterflies can’t resist nectar-rich blooms. Plant milkweed (essential for monarchs), zinnias, and buddleia to create a butterfly haven right outside your window. I once photographed over a dozen species in one afternoon around my butterfly bush!
For hummingbirds, go with tubular flowers like bee balm, salvia, and cardinal flower. Their vibrant reds and oranges act like magnets. The key is planting in clusters rather than scattered singles—this creates feeding stations where wildlife lingers longer, giving you more photo opportunities.
Don’t forget about host plants! Parsley and fennel attract swallowtail caterpillars, offering completely different photography subjects. By thoughtfully selecting your plantings, you’re not just gardening—you’re curating a living photography set that keeps giving throughout the seasons.
Water Features and Feeding Stations
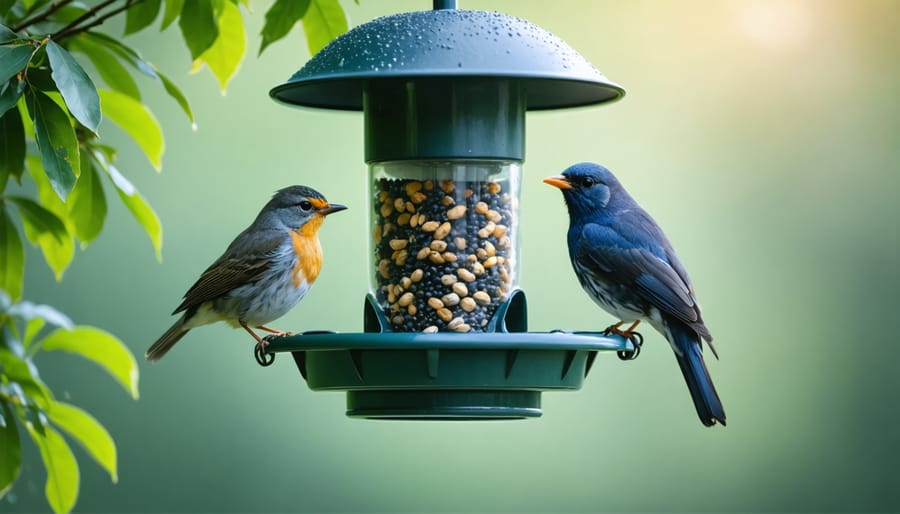
One of my favorite photography tricks is creating a “wildlife studio” right in your garden! Birdbaths and feeders act as natural gathering spots where animals return predictably throughout the day. Position a simple birdbath about 10-15 feet from a comfortable shooting location, ideally where morning or late afternoon light creates a warm glow. The key is patience—once birds discover your water feature, they’ll visit regularly, giving you repeated opportunities to perfect your shots.
I’ve found that keeping feeders stocked consistently trains wildlife to your schedule. Place them near natural perches like branches or garden stakes where birds pause before approaching—these make for more interesting compositions than feeder shots alone. A small fountain or dripping water feature is especially magnetic to wildlife, as the sound attracts birds from surprising distances. Set up your camera on a tripod, pre-focus on the water’s edge, and wait. You’ll be amazed how quickly your garden transforms into a wildlife photography hotspot!
Natural Perches and Backgrounds
Think strategically about what’s behind your wildlife subjects. Position feeders or birdbaths near shrubs or flowering plants at similar distances from your camera position—this creates beautifully blurred, complementary backgrounds rather than distracting fences or buildings. Natural branches make perfect perches; try placing a weathered stick near feeders where birds naturally land before approaching food. I’ve found that arranging plants in layers gives birds comfortable “staging areas” while providing those dreamy, soft-focus backgrounds that make wildlife photos shine. Clean up visual clutter like garden tools or bright plastic items that might appear in your frame’s background.
Camera Settings Simplified for Garden Wildlife
Shutter Speed for Sharp Shots
Capturing sharp images of fast-moving wildlife starts with your shutter speed—the length of time your camera’s sensor is exposed to light. Think of it as a fraction of a second: the bigger the bottom number (like 1/1000), the faster the shutter and the better you’ll freeze motion.
For most garden birds, aim for at least 1/1000 of a second. I learned this the hard way when my first cardinal photos turned into beautiful red blurs! Butterflies need around 1/500, while squirrels and rabbits do well at 1/500 to 1/1000.
Here’s a beginner-friendly tip: Use your camera’s “Shutter Priority” mode (marked as “S” or “Tv” on most cameras). You choose the shutter speed, and your camera automatically adjusts the other settings. Start with 1/1000 and experiment from there—your camera will tell you if there’s enough light for your chosen speed. On cloudy days, you might need to increase your ISO to maintain these faster speeds.
Aperture for Beautiful Backgrounds
One of the most delightful discoveries in garden wildlife photography is learning to create those dreamy, blurred backgrounds that make your subject pop. This technique, controlled by your camera’s aperture setting, transforms cluttered garden scenes into professional-looking portraits.
Think of aperture like the pupil of your eye—it controls how much light enters your camera. The setting is measured in f-stops, and here’s where it gets a bit counterintuitive: smaller numbers (like f/2.8 or f/4) create blurrier backgrounds, while larger numbers (like f/11 or f/16) keep everything sharp.
For garden wildlife, I typically start with an aperture around f/5.6. This gives you enough background blur to minimize distractions from garden furniture, fences, or neighboring plants, while keeping your feathered or winged visitor beautifully sharp. If you’re photographing butterflies on flowers and want both fully in focus, try f/8 instead.
Experiment in your own backyard! Set up near your bird feeder and try different f-stops to see how the background changes. You’ll quickly develop an eye for what works best.
ISO and Light in Garden Conditions
Garden lighting changes throughout the day, and your ISO settings should adapt accordingly. Think of ISO as your camera’s sensitivity to light—the higher the number, the more sensitive it becomes.
On bright, sunny days, start with ISO 100-200 for crisp, clear images of butterflies and birds. Your garden provides plenty of natural light, so there’s no need to push your camera’s capabilities.
As clouds roll in or you’re photographing in shaded areas under trees and shrubs, bump your ISO to 400-800. This helps maintain faster shutter speeds to freeze a hummingbird’s wings or capture a squirrel mid-leap.
Early morning and late afternoon—those magical golden hours when wildlife is most active—require ISO 800-1600. Don’t worry if your images look slightly grainy at higher ISOs; capturing the moment matters more than technical perfection when you’re starting out. Modern cameras handle these settings beautifully, and that slightly softer quality often adds charm to garden wildlife shots. Experiment with different settings in your space to discover what works best.
Timing and Patience: When to Shoot
Timing really is everything when it comes to garden wildlife photography! The “golden hours”—the first two hours after sunrise and the last two before sunset—offer the most magical lighting conditions. During these times, the soft, warm light creates beautiful highlights and gentle shadows that make your subjects practically glow. I’ve found that early morning is especially rewarding because many birds and butterflies are most active then, feeding after the night’s rest.
Throughout the day, wildlife behavior follows predictable patterns. Mid-morning often brings butterflies to sun-warmed flowers, while late afternoon sees birds making their final feeding rounds before roosting. Even overcast days have their advantages—the diffused light eliminates harsh shadows, perfect for capturing intricate wing patterns or detailed plumage.
Seasonal timing opens different photographic opportunities in your garden. Spring brings nesting birds gathering materials and territorial displays that make for dramatic shots. Summer offers butterflies at their peak, with multiple species visiting flowers throughout warm days. Autumn photography captures birds feeding intensively before migration, while winter draws unusual visitors to feeders when natural food sources dwindle.
Here’s something I learned from experienced garden photographers: patience isn’t just waiting—it’s observing. Spend time watching your garden without the camera. Notice where the robin always perches after hunting worms, or which lavender the bees prefer. These observations help you position yourself strategically.
Weather matters too! Light rain brings out slugs and snails (fascinating macro subjects), while the period immediately after rain sees birds bathing and preening. Even challenging conditions like fog can create ethereal, artistic images. The key is working with nature’s rhythms rather than against them, allowing the wildlife to come to you naturally.
Techniques for Approaching Garden Wildlife
Moving Slowly and Staying Still
Wildlife in your garden can sense tension and sudden movements from surprisingly far away. The key is moving like you’re part of the landscape—slow, deliberate, and calm. I’ve found that crouching low and approaching at an angle, rather than head-on, helps animals feel less threatened. They perceive direct approaches as predatory behavior.
Once you’re in position, patience becomes your best friend. Settle in and let the wildlife grow accustomed to your presence. Small birds often return to feeders within five to ten minutes if you remain still. Keep your movements minimal—even adjusting your camera should be done slowly and smoothly. Avoid direct eye contact with your subjects, as many animals interpret this as confrontation.
Your clothing matters too. Neutral colors help you blend in, and avoiding rustling fabrics means you won’t announce every minor shift. I like to think of it as becoming a temporary garden fixture—interesting but unthreatening, just another element of their familiar environment.
Using Blinds and Natural Cover
Your garden already offers fantastic natural hiding spots! Dense shrubs, pergolas, and garden sheds provide excellent cover—simply position yourself behind them and wait patiently for wildlife to appear. I’ve had wonderful success photographing birds from behind my overgrown hydrangeas, which act as a natural screen.
For a simple DIY blind, drape camouflage netting or earth-toned fabric over a tomato cage or garden arch. Position it near feeding stations or birdbaths a few days before photographing, allowing wildlife to become accustomed to its presence. Your garden furniture works brilliantly too—shooting from behind a bench or through trellis openings keeps you concealed while maintaining good angles.
Remember, staying still matters more than perfect concealment. Wildlife often ignores stationary objects but flees from sudden movements. Wear muted colors that blend with your garden’s palette, and avoid rustling or shifting position frequently. With practice, you’ll discover which garden spots offer the best combination of cover and photographic opportunity!
Building Trust with Regular Visitors
Patience truly pays off when photographing garden wildlife. The more time you spend quietly in your outdoor space, the more comfortable your regular visitors become with your presence. That robin who initially flew away at first sight will eventually feed just meters from your lens. Birds visiting your feeders, butterflies sampling your flowers, and even cautious squirrels learn to recognize you as part of their environment rather than a threat. Start by simply being present without your camera—read a book, tend nearby plants, or enjoy your morning coffee in the same spot daily. Once wildlife accepts you, gradually introduce your camera. This habituation process might take weeks, but you’ll be rewarded with relaxed, natural behavior and those magical close-up shots that make wildlife photography so rewarding.
Composition Tips for Captivating Wildlife Shots
Eye-Level and Angle Matters
Getting down to your subject’s eye level transforms ordinary snapshots into intimate, captivating portraits. When you photograph a butterfly or bird from above, you’re capturing what everyone sees from a standing position. But crouch down or lie on the ground, and suddenly you’re sharing their perspective—creating images that draw viewers in and forge an emotional connection.
In your garden, this might mean kneeling beside a flower bed to photograph a visiting bee, or sitting patiently on a garden stool positioned near a bird feeder. I’ve found that a waterproof garden kneeling pad makes this much more comfortable during longer photography sessions, especially on damp morning grass.
For ground-dwelling creatures like toads or ground-feeding birds, you’ll need to get even lower. Don’t worry about looking silly—your neighbors will understand once they see your stunning results! If mobility is a concern, try positioning your camera on a low tripod or beanbag and using a remote shutter release, allowing you to capture that perfect eye-level angle without the strain.
Rule of Thirds in Garden Scenes
Imagine dividing your camera screen into a tic-tac-toe grid with two horizontal and two vertical lines. That’s the rule of thirds! Instead of centering your butterfly or bird directly in the middle, position them along these lines or where they intersect. This simple trick instantly creates more dynamic, professional-looking photos.
When I photograph cardinals visiting my feeder, I place them on the right third of the frame, leaving space on the left where they’re looking. This “breathing room” feels natural and draws viewers into the scene. For a robin pulling a worm from your lawn, try positioning the action at one of those intersection points—your eye will naturally be drawn there.
Most cameras and phones have a grid overlay option in their settings. Turn it on! It’s like training wheels for composition, helping you break the centering habit that beginners naturally fall into.
Using Garden Elements as Framing
Natural frames transform ordinary wildlife shots into captivating compositions! Look around your garden for existing elements that can enhance your photos. Position yourself so flowering branches hang gracefully above a visiting hummingbird, or shoot through clusters of blooms to frame a butterfly in the background. These organic borders draw the viewer’s eye directly to your subject.
Garden structures work beautifully too—archways, trellises, and fence openings create ready-made frames. I’ve captured stunning bird photos by shooting through a rose-covered arbor, which added depth and context. Foreground foliage, even slightly out of focus, adds professional-looking dimension to your images.
The key is patience and positioning. Move around your subject (slowly, to avoid startling wildlife) until you find angles where natural elements surround your visitor. This technique also helps tell the story of your garden ecosystem. Just as you’d compose stunning flower photos, framing adds that artistic touch that makes wildlife images truly memorable.
Common Mistakes and How to Avoid Them
We’ve all been there – blurry bird photos, chopped-off butterfly wings, or perfectly empty feeders in our shots. Don’t worry! These common mishaps are simply stepping stones on your wildlife photography journey.
**Moving too quickly** is perhaps the most frequent mistake. I learned this the hard way when I scared away a gorgeous cardinal by rushing to grab my camera. Now, I keep my camera nearby and move in slow motion. Think of yourself as a wildlife ninja! Take a step, pause, observe your subject’s reaction, then take another step. If the bird or squirrel seems nervous, you’ve gone far enough.
**Getting discouraged by equipment limitations** holds many beginners back. Remember, even smartphone cameras can capture beautiful moments if you’re patient and creative. Focus on what you *can* do rather than what you can’t. That expensive lens can wait – your skills matter more.
**Photographing at the wrong times** leads to harsh shadows and squinting subjects. Early morning and late afternoon provide the softest, most flattering light. Set your alarm a bit earlier, grab your coffee, and watch the magic unfold.
**Forgetting about backgrounds** creates distracting images. Before clicking, glance behind your subject. Is there a clothesline cutting through? A trash can? Simply shifting your position slightly can transform a cluttered shot into something frame-worthy.
**Giving up too soon** is the biggest mistake of all. Wildlife photography requires patience and practice. Some days you’ll capture amazing shots; other days, nothing cooperates. Both experiences help you improve your photography technique. Celebrate small victories, learn from challenges, and keep shooting!
Practice Projects to Build Your Skills
The best way to improve your wildlife photography is by working on focused projects that build your confidence step by step. Here are three beginner-friendly projects you can start in your own garden this week.
**Project One: Butterfly Garden Portfolio (Week 1-2)**
Begin by photographing butterflies visiting your flowers during mid-morning when they’re most active but still calm. Start with your camera set to aperture priority mode (f/5.6) and auto ISO. Spend fifteen minutes each day approaching slowly and capturing at least ten different angles. Focus on getting sharp images of their wings first, then challenge yourself to capture them with flowers in the background. By week two, try photographing the same butterfly species in different lighting conditions—morning sun, shade, and late afternoon glow. This teaches you how light transforms your subject.
**Project Two: Bird Feeder Daily Documentation (Month-long)**
Set up a feeding station where you can photograph from a comfortable spot, perhaps through a window or from a nearby bench. Document which species visit at different times of day. Start with single portraits, then progress to capturing behavior—birds landing, eating, or interacting. This repetition builds your reflexes for catching action shots. Keep a simple journal noting your camera settings and which ones worked best.
**Project Three: Seasonal Garden Visitor Study (Three months)**
Choose one area of your garden and photograph the wildlife that visits throughout a season. Capture the spring butterflies on your early blooms, summer bees on lavender, and autumn birds eating seeds. This project teaches patience and helps you anticipate wildlife patterns, making you a better photographer naturally.
Each project builds specific skills while keeping things achievable and fun.
The beauty of wildlife photography is that your journey can begin the moment you step outside your back door. You don’t need exotic locations or thousands of dollars in equipment—your garden is already teeming with photographic opportunities waiting to be discovered. Every bird that visits your feeder, every butterfly that lands on your flowers, and every squirrel scampering across your lawn is a chance to practice and refine your skills.
I’ve seen countless beginners transform from hesitant shutterbugs to confident photographers simply by spending regular time in their gardens with a camera. The key is consistency and patience. Start tomorrow morning with your camera and a cup of coffee, and observe what unfolds around you. Notice the patterns—where birds prefer to perch, when butterflies are most active, how light changes throughout the day. Each session teaches you something new.
Remember, every stunning wildlife photograph you’ve ever admired started with a photographer who was once exactly where you are now. They missed focus, struggled with settings, and watched countless subjects fly away before they got the shot. But they kept practicing, learning from each experience, and gradually improving.
Your garden isn’t just a place to grow plants—it’s your personal photography classroom, open twenty-four hours a day. The wildlife that visits doesn’t judge your mistakes; they simply give you another opportunity to try again tomorrow. So grab your camera, step outside, and start capturing the remarkable wildlife moments happening right in your own backyard.