Plan your flower garden photoshoot during the golden hour – that magical window just after sunrise or before sunset when soft, warm light transforms ordinary blooms into stunning flower garden photos. Position yourself at eye level with the flowers, capturing their natural grace from angles that reveal delicate petals and intricate patterns. Create depth by incorporating layers of blooms, letting taller flowers frame shorter varieties while maintaining a clear focal point. Choose weather conditions wisely – overcast days provide perfect diffused lighting for capturing rich colors, while early mornings offer the bonus of dewdrops sparkling on petals. Consider the season’s palette, timing your shoot when complementary colors are in full bloom, creating a natural harmony that draws viewers into the scene. Whether you’re wielding a professional camera or smartphone, these fundamental techniques transform garden photography from simple snapshots into breathtaking botanical portraits that celebrate nature’s fleeting moments of perfection.
Perfect Timing: When to Capture Garden Magic
Golden Hours in the Garden
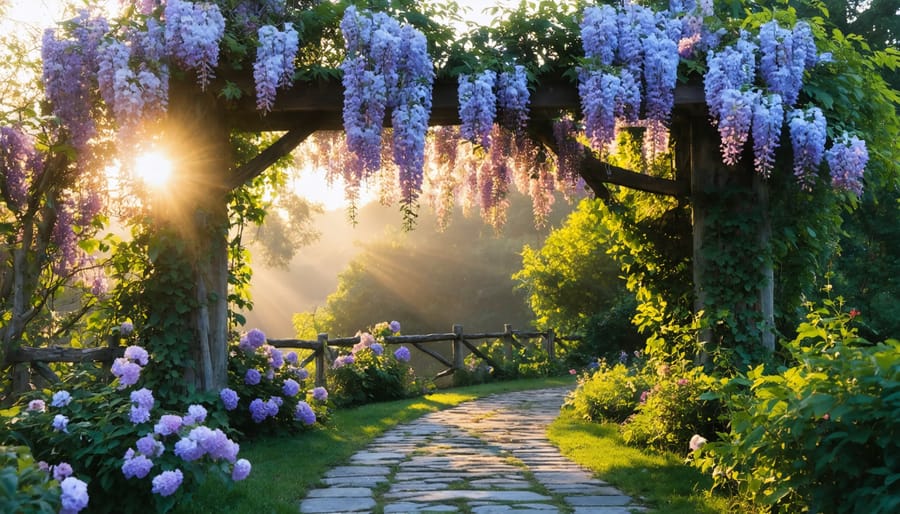
The magic of garden photography lies in understanding the power of golden hours – those precious moments during sunrise and sunset when natural light bathes your flowers in a warm, ethereal glow. These times offer the perfect conditions for capturing stunning garden photos, as the soft, directional light enhances colors and creates beautiful shadows that add depth to your images.
Early morning photography, just after sunrise, presents crisp, fresh-looking flowers still adorned with dewdrops, creating magical sparkles in your shots. The gentle morning light helps highlight delicate petals and creates a serene atmosphere in your photos. For the best natural light photography techniques, position yourself so the sun is behind or to the side of your subject.
Evening golden hour, approximately one hour before sunset, offers equally enchanting opportunities. The warm, golden light adds a romantic quality to your garden photos, making flowers appear to glow from within. This time is particularly ideal for capturing wider garden scenes, as the low-angled light creates long, interesting shadows that add drama and dimension to your compositions.
Remember to check the weather forecast before planning your shoot – slightly overcast conditions can actually work in your favor by providing naturally diffused light that’s perfect for close-up flower portraits.

Seasonal Sweet Spots
Each season offers unique opportunities to capture the beauty of your garden through your lens. Spring brings the delicate blooms of tulips, daffodils, and cherry blossoms, best photographed in early morning when the light is soft and dewy. Mid-morning to early afternoon is perfect for capturing the vibrant colors of spring flowers against fresh green foliage.
Summer gardens burst with dramatic subjects like roses, sunflowers, and dahlias. The “golden hours” – just after sunrise or before sunset – provide warm, magical lighting that makes summer blooms glow. For more subtle shots, try photographing on slightly overcast days when the light is naturally diffused.
Fall creates stunning photo opportunities with chrysanthemums and autumn foliage. The low autumn sun creates long shadows and interesting textures, particularly in late afternoon. Don’t overlook ornamental grasses, which look spectacular when backlit during this season.
Winter might seem challenging, but frost-covered seed heads, evergreen structures, and early bloomers like hellebores offer unique photographic possibilities. Early morning frost sessions can yield striking images, while midday winter sun highlights garden architecture and shadows in the snow.
Setting Up Your Garden Photo Shoot
Essential Equipment and Props
To capture stunning garden photos, you’ll need both photography equipment and gardening tools. Let’s start with the camera gear: a DSLR or mirrorless camera with a versatile lens (24-70mm is ideal) will give you the flexibility to capture both wide garden scenes and detailed flower close-ups. A macro lens is fantastic for those intimate flower portraits, revealing intricate details like dewdrops and delicate petals.
Essential accessories include a sturdy tripod to keep your camera steady, especially during golden hour shots, and a circular polarizing filter to manage glare and enhance colors. Don’t forget extra batteries and memory cards – garden shoots can last longer than expected when you’re having fun!
For the garden prep side, gather basic tools like pruning shears for quick touch-ups, a small rake to tidy the ground, and a spray bottle filled with water to add fresh dewdrops to flowers. A collapsible reflector can help control shadows and create even lighting on cloudy days.
Consider bringing some props to enhance your compositions: vintage watering cans, decorative plant markers, or antique garden tools can add character to your shots. A small stepladder or portable stool will help you capture different angles, while a clean cloth is handy for wiping off any dirt or water spots from your gear.
Keep everything organized in a weather-resistant camera bag and a small garden tote, making it easy to move around your garden while keeping your equipment protected and accessible.

Garden Prep Checklist
Before capturing your garden’s beauty through the lens, proper preparation is essential for stunning results. Start by assessing your garden space and removing any dead leaves, fallen branches, or unwanted weeds that might distract from your photos. Take time to deadhead spent blooms and trim back any overgrown plants that could create visual clutter.
Give your garden a gentle spruce-up by sweeping pathways and cleaning any garden ornaments or structures. However, avoid making everything too pristine – a touch of natural charm adds character to your photos. If you have garden furniture or decorative elements, consider their placement and whether they enhance or detract from potential photo compositions.
Water your plants the evening before your planned photoshoot, but avoid overhead watering that could leave water spots on petals and leaves. Early morning dew can create magical effects, but artificial water droplets often look staged in photos.
Check your garden’s overall design flow and create focal points by grouping complementary colors together or highlighting standout specimens. Consider adding temporary elements like butterfly-friendly flowers or colorful props that align with your vision, but keep them natural and subtle.
Finally, prepare any tools or props you might need during the shoot: plant supports for wind protection, reflectors for lighting control, and a small gardening kit for last-minute touch-ups. Remember, the goal is to enhance your garden’s natural beauty, not completely transform it.
Composition Techniques for Garden Photography
Finding Your Focal Point
Every stunning garden photo starts with identifying the perfect focal point – that special element that draws the viewer’s eye and tells your garden’s story. Start by taking a slow walk through your garden, noting which elements naturally catch your attention. This might be a magnificent rose bush in full bloom, an artistic garden statue, or a charming vintage bench draped with climbing vines.
When selecting your focal point, consider both the visual impact and the seasonal timing. A cluster of vibrant dahlias can create a dramatic centerpiece in late summer, while spring might showcase a breathtaking collection of tulips or flowering cherry trees. Look for elements that demonstrate professional composition techniques like leading lines, natural framing, or the rule of thirds.
Don’t limit yourself to just flowers – architectural elements like archways, garden gates, or decorative trellises can serve as compelling focal points that add depth to your photos. Water features, when present, often make excellent focal points, especially during golden hour when the light creates magical reflections.
Remember that your focal point doesn’t need to be centered in the frame. Sometimes, positioning it slightly off-center creates more visual interest and movement in your photograph. Try different angles and perspectives – get down low to capture flowers against the sky, or position yourself to include complementary background elements that enhance your chosen focal point.
If you’re struggling to find a single standout element, look for natural groupings or patterns in your garden. A series of identical planters, a perfectly curved pathway, or a repeated color scheme can create a strong visual focus that ties your image together.

Creating Depth and Interest
Creating depth and interest in your garden photos is all about thoughtful composition and layering techniques. Start by identifying natural frames within your garden, such as archways, tree branches, or climbing vines. These elements can draw the viewer’s eye into the image and create a sense of depth that makes your photos more engaging.
Try positioning yourself at different angles to capture layers of flowers. For instance, place tall flowers or ornamental grasses in the background, medium-height blooms in the middle ground, and shorter flowers or ground cover in the foreground. This three-layer approach adds dimension and makes viewers feel like they’re stepping into your garden.
Consider using the “through the flowers” technique, where you shoot through foreground blooms to focus on flowers further back. This creates a dreamy, soft effect and adds visual interest to your compositions. When using this method, set your camera to a wider aperture (lower f-number) to achieve a beautiful blur effect on the foreground elements.
Leading lines are another powerful tool in garden photography. Use garden paths, rows of flowers, or even the natural curve of flower beds to guide the viewer’s eye through your image. Early morning or late afternoon light can help emphasize these lines while creating enchanting shadows and highlights.
Don’t forget about negative space – areas without flowers can be just as important as the blooms themselves. Including some breathing room in your compositions helps prevent your photos from feeling overcrowded and allows individual flowers to stand out more effectively.
Common Garden Photography Challenges
Weather and Wind Solutions
Weather and wind can present significant challenges during a garden photoshoot, but there are several effective solutions to help you capture stunning images regardless of conditions. For overcast days, embrace the natural diffused lighting, which can actually enhance the richness of flower colors and reduce harsh shadows. If you’re dealing with bright sunlight, consider using a translucent diffuser or waiting for early morning or late afternoon when the light is softer.
Wind is perhaps the biggest challenge for garden photographers, as even a gentle breeze can cause flowers to blur in photos. Try using a faster shutter speed (1/250 second or higher) to freeze motion. For close-up shots, a garden blind or portable windbreak can protect delicate blooms. Another helpful trick is to use a plant support or temporary stake to stabilize taller flowers.
If rain threatens your shoot, don’t pack up just yet! Raindrops on petals can create magical macro opportunities. Keep a clear umbrella handy to protect your equipment, and consider using a pop-up canopy for longer sessions. After rain, look for beautiful water droplets on flowers and leaves – these can add a stunning dimension to your photos.
Remember that changing weather conditions can create unique lighting situations. A passing cloud or break in the rain might provide that perfect moment of filtered sunshine for your shot. Stay patient and be prepared to work quickly when conditions align.
Managing Shadows and Contrast
Managing shadows and contrast in garden photography can make the difference between a good photo and a stunning one. The key is understanding how to work with natural light throughout the day. During harsh midday sun, use a white sheet or translucent diffuser held above your flowers to soften harsh shadows. This creates more even lighting and helps capture the true colors of your blooms.
Early morning and late afternoon offer the best natural lighting conditions, known as the “golden hours.” During these times, shadows are longer and softer, creating beautiful depth in your images. If you’re shooting on a bright day, try positioning yourself so that the sun is behind your flowers. This backlighting can create magical glowing effects, especially with delicate petals.
For darker areas of your garden, consider using a reflector to bounce light back onto your subjects. A simple white piece of cardboard works well in a pinch! When photographing white flowers, slightly underexpose your shot to preserve the delicate details that might otherwise be lost in bright conditions.
Cloudy days are actually perfect for garden photography, as they provide natural diffusion and eliminate harsh shadows. Take advantage of overcast conditions to capture the subtle color variations in your flowers without fighting with strong contrast.
Remember to check your camera’s display frequently and adjust your settings as the light changes throughout your photo session. This helps ensure consistent, well-balanced images that showcase your garden’s true beauty.
A flower garden photoshoot is more than just capturing beautiful blooms – it’s about preserving memories, sharing the joy of gardening, and celebrating nature’s endless creativity. As we’ve explored throughout this guide, successful garden photography combines thoughtful timing, proper equipment setup, and an eye for composition.
Remember that the best photos often come during the golden hours of early morning or late afternoon when the light is soft and warm. Don’t be afraid to experiment with different angles, get close to your subjects, and embrace the natural elements that make your garden unique. Even morning dew or a gentle breeze can add magical elements to your images.
Whether you’re using a professional camera or your smartphone, the techniques we’ve discussed will help you capture the essence of your garden’s beauty. Start with the basics – understanding light, composition, and your camera settings – then gradually explore more creative approaches as your confidence grows.
Most importantly, enjoy the process. Garden photography is a wonderful way to document your garden’s evolution throughout the seasons and share your horticultural achievements with others. Every garden tells a story, and through your lens, you can capture these stories in ways that inspire and delight.
So grab your camera, head out to your garden, and start capturing those magical moments. With practice, patience, and the tips we’ve shared, you’ll soon be creating stunning images that showcase the natural beauty of your flower garden.


