Picture your garden thriving through scorching summers while you water half as often, if not less. That’s the promise of wicking bed gardens, an ingenious self-watering system that’s transforming how gardeners approach irrigation and water conservation.
If you’ve ever returned from vacation to find wilted plants or watched your vegetables struggle during heat waves despite daily watering, you’re experiencing what wicking beds elegantly solve. These raised beds contain a hidden water reservoir beneath the soil that delivers moisture directly to plant roots through capillary action, the same force that draws water up through a paper towel. Your plants drink exactly what they need, when they need it, eliminating both overwatering and underwatering in one smart design.
The concept isn’t new, but it’s experiencing a renaissance among home gardeners who’ve discovered its remarkable benefits. You’ll use up to 50% less water than traditional gardens, spend far less time with the hose in hand, and watch your vegetables produce more abundantly thanks to consistent moisture levels. Better still, nutrients stay where they belong, in the root zone rather than leaching away with surface watering.
Building a wicking bed does require initial effort and investment, but the payoff in time saved, water conserved, and harvests gathered makes it worthwhile for anyone serious about growing food efficiently. Whether you’re dealing with water restrictions, sandy soil that won’t hold moisture, or simply want a lower-maintenance garden that performs beautifully, wicking beds deserve your consideration.
What Makes Wicking Beds Different From Traditional Gardens
The Science Behind Self-Watering Soil
Think back to when you were a kid watching a paper towel soak up spilled juice. Remember how the liquid seemed to climb upward against gravity, spreading through the fibers? That’s capillary action, and it’s the exact same force that makes wicking beds work so brilliantly.
In your wicking bed, water sits in a reservoir at the bottom, waiting beneath a layer of gravel or pebbles. From there, it travels upward through tiny spaces in the soil, kind of like how a sponge draws water up when you touch just the corner to a puddle. These microscopic pathways between soil particles act like thousands of miniature straws, pulling moisture exactly where plant roots need it.
The magic happens because water molecules love sticking to each other and to soil particles. As water clings to the soil in these tiny spaces, it creates a chain reaction that draws more water up from below. Your plants’ roots then absorb this moisture at their own pace, taking exactly what they need when they need it.
What makes this especially clever is that gravity still plays a role. As plants drink the water and evaporation occurs, the soil creates tiny pockets of empty space. The reservoir below automatically refills these spaces through capillary action, maintaining consistent moisture levels throughout the soil profile. It’s nature’s own self-regulating watering system, requiring no electricity, timers, or guesswork on your part.
Key Components Every Wicking Bed Needs
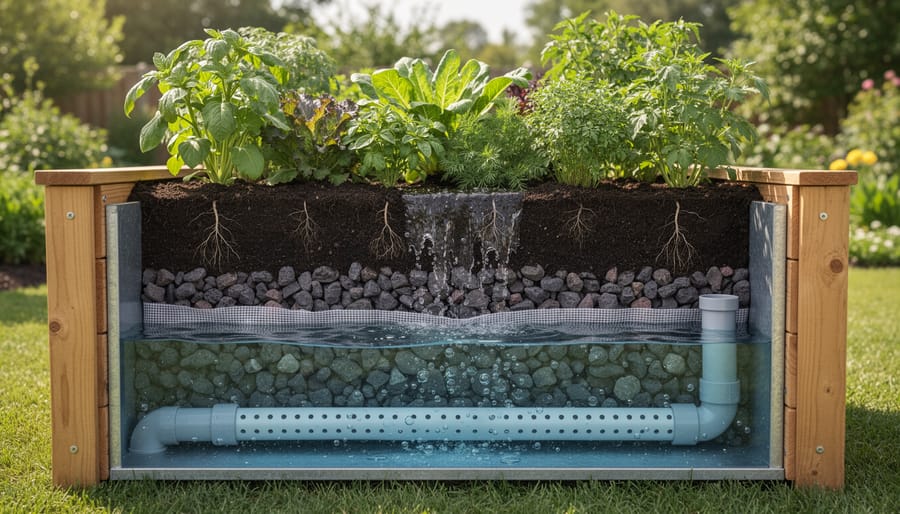
Building a successful wicking bed is like creating a layered cake, where each component plays a vital role in keeping your plants hydrated and thriving. Let me walk you through what you’ll need to gather before you start.
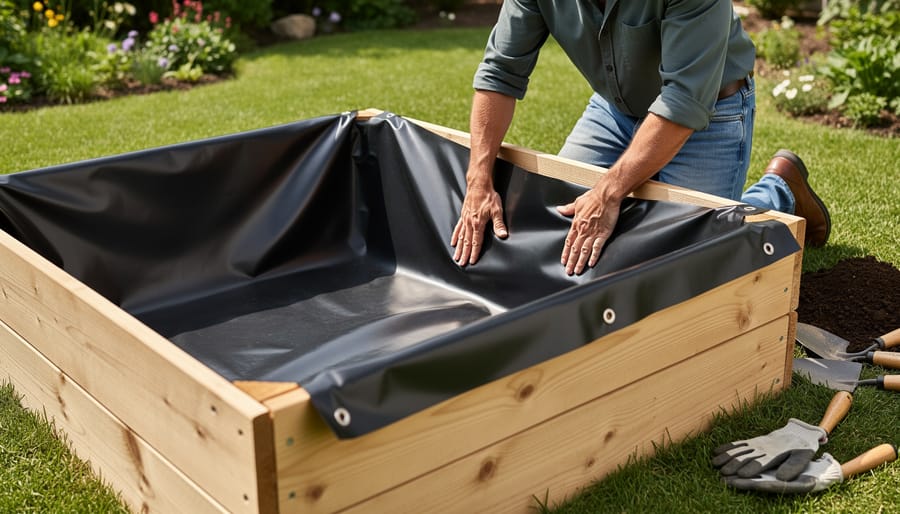
At the very bottom, you’ll need a waterproof liner to contain your water reservoir. This is typically a pond liner or heavy-duty plastic sheeting that prevents water from seeping into the surrounding soil. Think of it as the foundation that makes the whole system work.
Next comes the water reservoir layer, which is created using drainage pipe or agricultural pipe. This pipe, usually perforated PVC with an access point, allows you to fill the reservoir easily and monitor water levels. Position one end above the soil surface so you can simply pour water in when needed.
The reservoir zone itself consists of gravel or scoria, materials that create air pockets while holding water. Scoria is particularly popular because it’s lightweight and provides excellent water retention. This layer typically sits about 12 inches deep, though you can adjust based on your plants’ needs.
Here’s where the magic happens: geotextile fabric separates the reservoir from your growing medium. This permeable layer allows water to wick upward while preventing soil from clogging the reservoir below. Don’t skip this step, as it’s crucial for long-term success.
Finally, top everything with quality growing medium. A mix of compost, coconut coir, and quality soil works beautifully, giving your plants the nutrients they need while allowing moisture to travel upward through capillary action.
With these components assembled correctly, you’re creating a self-watering system that’ll keep your garden flourishing with minimal effort.
Benefits That’ll Make You Rethink Your Entire Garden
Let me tell you something that changed my entire approach to gardening: wicking beds deliver benefits that go way beyond just keeping your plants alive. They’re honestly a game-changer, especially if you’ve been struggling with the endless cycle of watering.
First up, let’s talk water savings. Wicking beds use up to 50% less water than traditional gardens. That’s not a typo. Half the water! The reservoir system means virtually zero evaporation and no wasteful runoff. Every drop goes exactly where it’s needed – directly to your plant roots. If you’re in an area with water restrictions or just want to be more sustainable, this alone makes wicking beds worth considering.
Here’s where it gets even better: you’ll water far less frequently. Instead of daily watering during hot summer months, you might only need to refill your reservoir once a week, or even every two weeks depending on your climate and what you’re growing. I can’t tell you how liberating it feels to actually go on vacation without worrying about coming home to crispy, dead plants. Your garden becomes low-maintenance without sacrificing results.
The consistent moisture level is something your plants will absolutely love. Unlike surface watering that creates feast-or-famine conditions, wicking beds maintain steady hydration from below. This means healthier root systems, less stress on plants, and more productive harvests. No more wilted tomatoes one day and waterlogged ones the next.
Another unexpected perk? Fewer weeds. Because you’re not constantly wetting the soil surface, weed seeds struggle to germinate. The ones that do pop up are easier to pull from the consistently moist soil. It’s like getting a head start in the battle against unwanted plants.
For those dealing with mobility challenges, wicking beds are particularly wonderful. Raised designs mean less bending and kneeling, making container gardening and small space gardening accessible to everyone. You can build them at whatever height works best for you, turning gardening from a painful chore into an enjoyable activity again.
The bottom line? Wicking beds give you healthier plants with less work, lower water bills, and more freedom. That’s the kind of gardening math that makes sense.
Building Your First Wicking Bed: A Weekend Project
Choosing Your Location and Size
Let me help you find the perfect spot for your wicking bed! Just like raised bed gardens, wicking beds thrive with at least six hours of direct sunlight daily. Choose a level area close to your house for easy access and monitoring, especially while you’re getting the hang of water levels.
For first-timers, I recommend starting modest. A bed measuring 3 feet by 6 feet gives you plenty of growing space without overwhelming your budget or patience. You can always expand once you’ve experienced the magic yourself!
Depth matters tremendously for effective wicking. Plan for a total depth of 12 to 18 inches. Here’s the breakdown: reserve 8 to 12 inches for your water reservoir at the bottom, then add 6 to 8 inches of growing soil on top. This ratio ensures water wicks upward efficiently while giving roots adequate space to flourish.
Pro tip from my own experience: avoid placing your bed directly under trees. Those roots are sneaky and will find their way into your lovely reservoir, defeating the whole purpose! Also, consider proximity to your water source for easier refilling.
Materials You’ll Need (And Where to Find Them Cheap)
Building a wicking bed doesn’t have to break the bank! Let’s start with your container – repurpose large storage tubs, old bathtubs, or even wooden pallets lined with pond liner (around $30-50 for enough liner for multiple beds). For the water reservoir, affordable options include agricultural pipe ($10-15 per length) or create fill tubes from PVC offcuts.
Your wicking layer needs porous material like scoria, gravel, or crushed rock (roughly $30-60 per cubic meter from landscape suppliers). Here’s a money-saving tip: check building sites for leftover materials or browse online classifieds for free pavers you can break up.
Don’t forget geotextile fabric to separate soil from gravel ($15-20 per roll). Old shade cloth works beautifully as a budget alternative. For the growing medium, mix your own using compost, quality soil, and perlite or vermiculite (approximately $40-80 depending on bed size).
Thrift stores and salvage yards are goldmines for containers, while landscape supply businesses often have discounted “seconds” materials. Many gardeners successfully build 2×1 meter wicking beds for under $100 using creative sourcing. Remember, the initial investment pays dividends through reduced water bills and thriving plants year-round!
Assembly Steps That Actually Make Sense
Ready to build your wicking bed? I promise this is more straightforward than it might seem. I’ve walked dozens of gardeners through this process, and the most common feedback I hear is, “That was easier than I expected!” Let’s break it down into manageable steps.
1. Build or position your frame. Whether you’re using a raised bed kit, repurposed timber, or concrete blocks, ensure your container is at least 12 inches deep. Level the ground beneath it and check for stability. This foundation matters more than you might think—a wobbly frame leads to liner tears down the road.
2. Install your pond liner carefully. This is where many first-timers rush and regret it. Drape the liner loosely into the frame, pressing it gently into corners without stretching. Leave at least 6 inches of excess hanging over the top edge. Secure it temporarily with clips or heavy stones. Here’s a mistake to avoid: don’t trim the liner yet! You’ll adjust it after filling with water.
3. Create your reservoir layer. Place your overflow pipe first—it should sit about 8-10 inches from the bottom, with the top opening at your desired water level. Now add your water reservoir material. Agricultural drainage cell is the gold standard, but upturned plastic pots or PVC pipe sections work beautifully too. This 8-10 inch layer becomes your water storage zone.
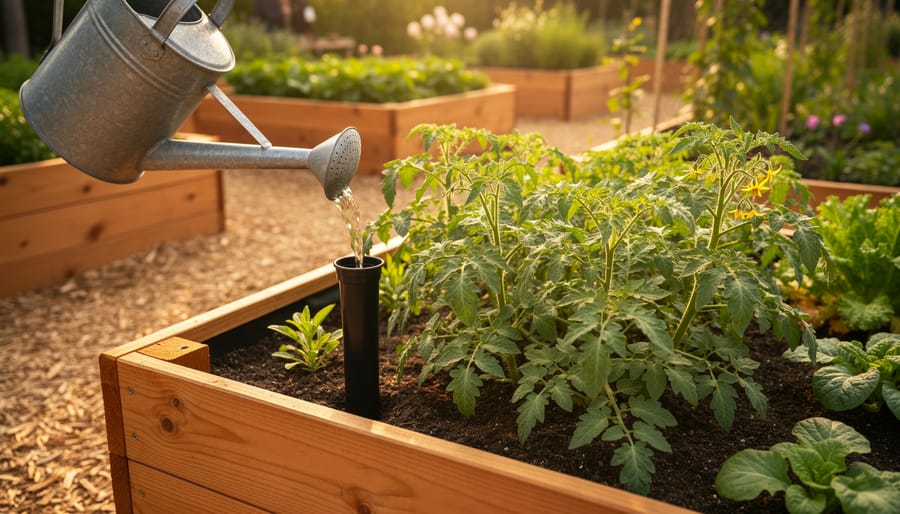
4. Install the inlet pipe. Position a vertical pipe that reaches from above soil level down into the reservoir. This is your watering access point, so place it somewhere convenient—I like mine near a corner for easy hose access.
5. Add your geotextile barrier. Lay landscape fabric or shade cloth over the entire reservoir layer, cutting holes for your pipes. This prevents soil from clogging your reservoir while allowing water to wick upward. Overlap seams by at least 6 inches.
6. Fill with growing medium. Here’s where patience pays off. Add your quality growing medium in layers, moistening as you go. This prevents air pockets and ensures good capillary action. Fill to within 2 inches of the top.
7. Initial saturation. Pour water slowly into your inlet pipe until it appears at the overflow. This first fill can take 30-60 minutes—that’s normal! You’re saturating both the reservoir and the soil column above it.
Now trim that excess liner, fold it over the frame edge, and secure it. You’re done! The hardest part is waiting to plant.
Which Plants Absolutely Thrive in Wicking Beds
The All-Stars: Vegetables That Love Consistent Moisture
Wicking beds are like having a personal watering assistant for moisture-loving vegetables. Some plants absolutely thrive with that steady, consistent hydration from below, and you’ll see the difference in both yield and flavor.
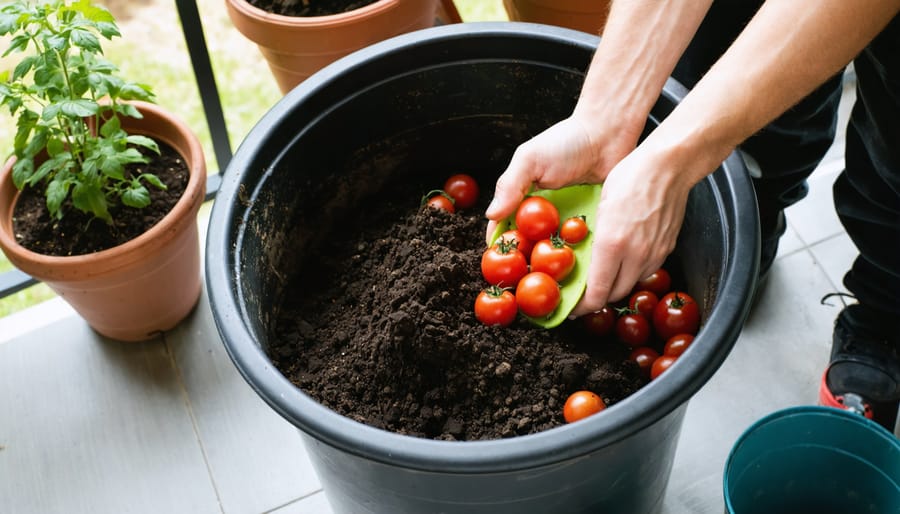
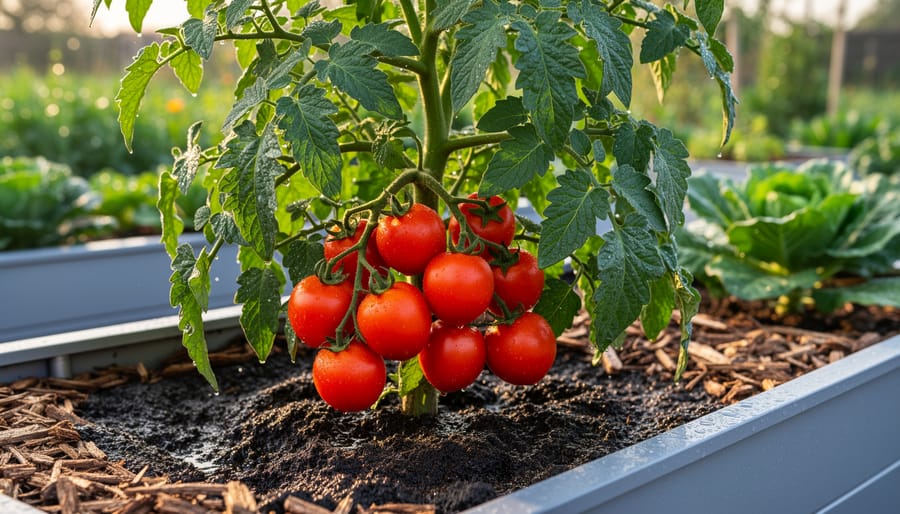
Tomatoes are the superstars here. They hate inconsistent watering, which causes blossom end rot and cracked fruit. In a wicking bed, they get exactly what they need, producing juicy, perfectly formed tomatoes all season long. Leafy greens like lettuce, spinach, and chard also flourish with constant moisture, staying tender and less likely to bolt in summer heat.
Cucumbers are another winner. These thirsty plants can be demanding, but wicking beds keep them producing crisp, non-bitter cukes without you running the hose daily. Peppers, both sweet and hot varieties, develop beautifully with steady moisture, giving you thick-walled, flavorful fruits.
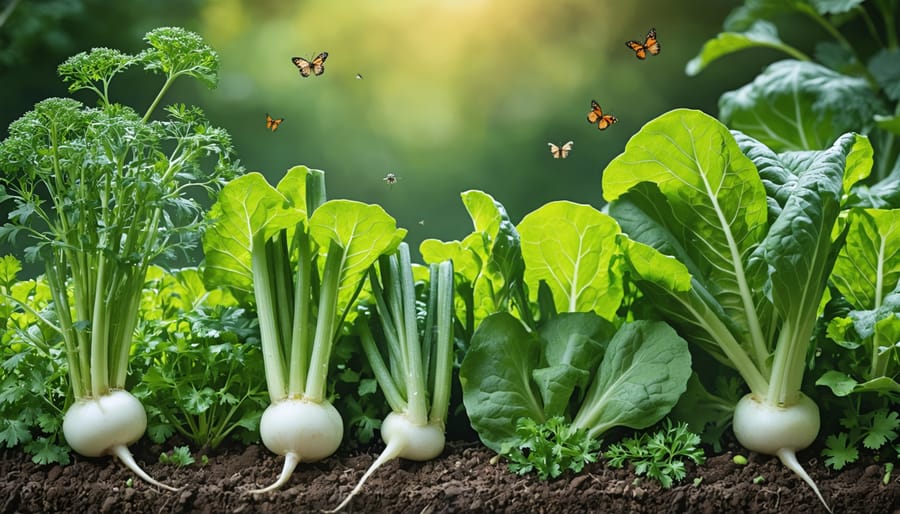
Don’t forget celery, which is notoriously finicky about water, and summer squash, which produces prolifically when its roots stay evenly moist. Even herbs like basil and parsley appreciate the consistent environment.
The beauty is that once your wicking bed is filled, these plants essentially water themselves from below, freeing you to enjoy your garden rather than worry about it.
Plants to Approach With Caution
While wicking beds work wonderfully for most plants, a few prefer drier conditions and may need special consideration. Root vegetables like carrots, beets, and parsnips can sometimes split or develop rot in consistently moist environments, though many gardeners successfully grow them by positioning them at the edges where moisture levels are slightly lower. Mediterranean herbs such as rosemary, lavender, and oregano naturally thrive in drier soil and may become leggy or develop root issues with constant moisture. If you’re set on growing these plants, consider using shallower wicking beds or creating raised mounds within the bed to provide better drainage. Alternatively, reserve traditional pots or a separate dry garden area for these water-conscious plants. The beauty of wicking beds lies in their flexibility, so don’t feel discouraged if certain plants need different accommodations.
Maintaining Your Wicking Bed Throughout the Seasons
How Often to Actually Fill the Reservoir
Here’s the truth that’ll make your life easier: wicking beds need refilling far less often than you think. In hot summer months, you might top up every 7-10 days, while during cooler seasons or rainy periods, you could go 2-3 weeks or longer between fills. Your climate makes all the difference—gardeners in Arizona will refill more frequently than those in Seattle.
Plant selection matters too. Thirsty crops like tomatoes and cucumbers drain the reservoir faster than drought-tolerant herbs. I learned this the hard way when my zucchini patch seemed to gulp down water twice as fast as my lettuce bed.
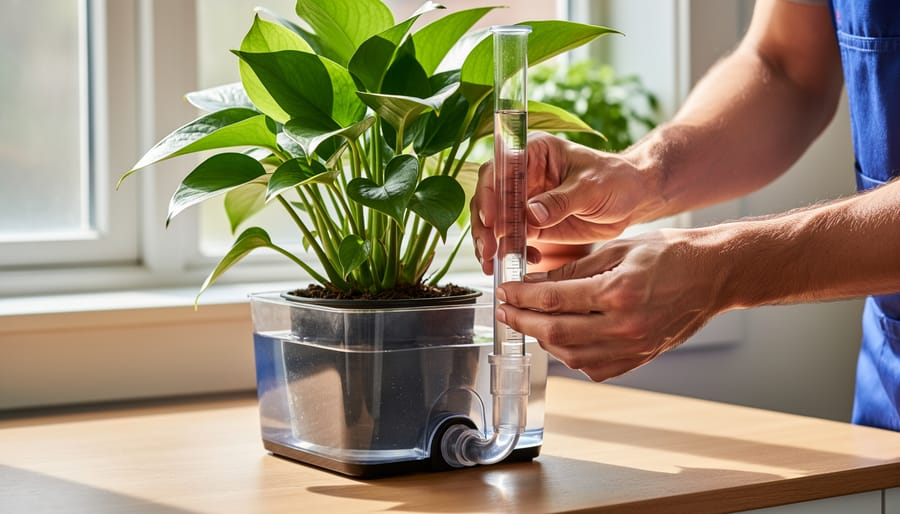
The best indicator? Install a simple water level indicator tube when building your bed—it’s just a clear pipe that shows exactly how much water remains. No guessing required! You can also watch your plants. If they’re wilting in the morning (not just during afternoon heat), it’s definitely time to refill.
Another telltale sign is checking the soil moisture about 4 inches down. If it feels dry rather than pleasantly damp, your reservoir is likely running low. With experience, you’ll develop an intuitive sense for your specific garden’s rhythm, adjusting your schedule as seasons change and plants mature.
Feeding Your Plants When Water Comes From Below
Feeding your wicking bed requires a slightly different approach than traditional gardens, and here’s why: since water moves upward from the reservoir, you’ll want to avoid water-soluble fertilizers that get washed down into the water supply. Instead, think of your wicking bed as preferring its meals served from above.
Top-dressing with compost is your best friend here. Every few months, spread a generous layer of well-aged compost across the soil surface. As you water from above occasionally (yes, a little top watering now and then is perfectly fine), nutrients will gradually work their way into the root zone. This mimics how nature feeds plants and keeps your reservoir water clean.
Slow-release fertilizers are another excellent option. Choose organic pellets or granules that break down gradually over time, releasing nutrients as plants need them. Apply these at the soil surface according to package directions, typically at the start of each growing season.
I’ve found that wicking beds actually need less frequent fertilizing than traditional gardens because nutrients aren’t constantly leaching away with excess water. Your plants will show you what they need through their growth and leaf color, so pay attention and adjust accordingly.
Troubleshooting When Things Don’t Go as Planned
Even the best-designed wicking beds can throw you a curveball now and then, but don’t worry—most issues have straightforward fixes that won’t require dismantling your hard work.
If you notice green, slimy algae growing on your soil surface or reservoir edges, you’re dealing with excess light and moisture meeting up. The solution? Add a thicker layer of mulch to shade the soil, which blocks light from reaching those damp areas. You can also reduce your water level slightly if the reservoir is consistently too full. I learned this the hard way after my first wicking bed turned into a science experiment!
Salt buildup appears as white, crusty deposits on the soil surface and happens when minerals from water and fertilizers accumulate without regular flushing. Every few months, water your bed from above with a hose or watering can, allowing the water to flow through and flush salts downward and out through any drainage holes. This overhead watering mimics natural rainfall and keeps things balanced.
If your plants show signs of underwatering despite a full reservoir, you’ve got a wicking problem. Check that your wicking material hasn’t developed air gaps or become compacted. Sometimes, gently aerating the soil with a garden fork helps re-establish capillary action. You might also need to add more wicking material or ensure it’s making solid contact with both the water and the growing medium above.
Overflow issues during heavy rain are common but fixable. Make sure your overflow pipe is positioned correctly and isn’t blocked by debris. If water still backs up, consider adding a second overflow at a slightly lower level for extra insurance.
Remember, these hiccups are part of the learning process, and each one teaches you something valuable about how your specific wicking bed operates. Most problems announce themselves early and respond well to simple adjustments.
If you’re feeling inspired to give wicking beds a try, my advice is simple: start small. Build just one bed and see how it performs in your space. You don’t need to transform your entire garden overnight. In fact, starting with a single wicking bed lets you learn the system, observe how your plants respond, and adjust your approach before committing to a larger project.
The beauty of wicking beds is that they’re an investment that keeps paying off. Yes, the initial setup requires some time and materials, but the long-term rewards in water savings, healthier plants, and reduced maintenance make it absolutely worthwhile. I’ve watched friends slash their watering time in half while their vegetables thrive better than ever before.
Once you’ve built your wicking bed and seen those first successful harvests, I’d love to hear about your experience. Every garden is different, and sharing what worked for you, what challenges you faced, and creative solutions you discovered helps the entire gardening community grow stronger together.
Here’s the exciting part: wicking beds genuinely transform gardening from a daily chore into a more sustainable, enjoyable practice. Instead of worrying about whether you watered enough or rushing outside with the hose every evening, you’ll find yourself with more time to simply enjoy your garden and watch your plants flourish with consistent, reliable moisture. That’s the kind of gardening we all deserve.