Your garden can become a thriving ecosystem that works with nature rather than against it. Start by **replacing synthetic fertilizers with compost and aged manure**, feeding your soil’s microbial life while reducing chemical runoff into waterways. **Install a rain barrel system** to capture free water from your roof, cutting municipal water use by up to 40% during growing season. **Attract beneficial insects like ladybugs and lacewings** by planting native flowers along garden borders—they’ll handle pest control naturally, eliminating the need for harmful pesticides.
The shift to sustainable gardening doesn’t require abandoning everything you know. Instead, it’s about making smarter choices that benefit both your plants and the planet. Traditional gardening methods often rely heavily on petroleum-based products, deplete soil health over time, and create unnecessary waste. Sustainable practices flip this script entirely.
I recently spoke with Maria Chen, a master gardener who transformed her suburban yard into a certified wildlife habitat using these exact principles. “The first year felt like an experiment,” she told me, “but by year two, my garden practically maintained itself. I spend less time fighting problems and more time enjoying the space.”
Whether you’re tending a small balcony container garden or managing acres of landscape, sustainable methods adapt to your situation. The following guide breaks down practical techniques across soil health, water conservation, natural pest management, and tool selection—each designed to integrate seamlessly into your existing routine while delivering measurable environmental benefits.
Why Traditional Garden Maintenance Falls Short
For decades, many of us have relied on gardening practices that seemed effective but come with hidden environmental costs. I remember when my neighbor proudly showed me his lush lawn, achieved through weekly applications of synthetic fertilizers. What he didn’t realize was that those chemicals were leaching into our local watershed, contributing to algae blooms downstream.
Chemical fertilizers and pesticides remain the most problematic aspects of traditional gardening. While they promise quick results, they destroy beneficial soil organisms, contaminate groundwater, and harm pollinators essential for garden health. These synthetic products create a dependency cycle—once you start, your soil becomes reliant on them because its natural fertility has been compromised.
Excessive watering presents another challenge. Many gardeners operate sprinklers on fixed schedules regardless of weather conditions or plant needs. This wastes thousands of gallons annually and promotes shallow root systems, making plants more vulnerable to drought. I’ve seen beautiful gardens struggle simply because they were “loved to death” with too much water.
Gas-powered tools like lawn mowers, leaf blowers, and hedge trimmers contribute significantly to air pollution. According to the EPA, one hour of operation from a gas mower produces emissions equivalent to driving a car for 100 miles. The noise pollution also disrupts wildlife and neighborhood tranquility.
Traditional maintenance often ignores natural ecosystems, treating gardens as separate from the environment rather than part of it. Raking every fallen leaf, removing all plant debris, and maintaining monoculture lawns eliminate habitat for beneficial insects and disrupt natural nutrient cycling. Transitioning to organic gardening methods addresses these issues while creating healthier, more resilient gardens that work with nature instead of against it.
Building Healthy Soil the Natural Way
Composting: Turn Waste Into Garden Gold
Composting transforms your kitchen scraps and yard waste into nutrient-rich “black gold” that your plants will absolutely love. I’ll admit, I was intimidated by composting at first, but once I got started, I couldn’t believe how simple it actually is!
**Getting Started**
You don’t need fancy equipment—a simple bin or even a designated pile in your yard works perfectly. Choose a spot with good drainage and partial shade. Layer “green” materials (nitrogen-rich items like fruit peels, vegetable scraps, coffee grounds, and fresh grass clippings) with “brown” materials (carbon-rich items like dry leaves, newspaper, cardboard, and small twigs). Aim for a ratio of roughly one part green to two parts brown.
**What to Add and Avoid**
Do add: fruit and vegetable scraps, eggshells, tea bags, yard trimmings, and shredded paper. Avoid: meat, dairy, oils, pet waste, and diseased plants—these attract pests or introduce problems.
**Troubleshooting Tips**
Smelly compost? You’ve got too many greens—add more browns and turn it to increase airflow. Too dry and not breaking down? Add water and more green materials. Attracting pests? Bury food scraps deeper in the pile and avoid adding problematic items.
Turn your pile every few weeks to speed decomposition. In 2-6 months, you’ll have rich, crumbly compost ready to nourish your garden naturally!

Mulching Strategies That Save Water and Suppress Weeds
Mulching is like giving your garden a cozy blanket that works overtime! This simple practice conserves moisture, suppresses weeds, regulates soil temperature, and gradually enriches your soil as organic materials break down.
**Organic mulch options** include shredded leaves, straw, wood chips, and grass clippings—each with unique benefits. Wood chips work wonderfully for perennial beds and pathways, lasting 2-3 years, while grass clippings are perfect for vegetable gardens, decomposing quickly to feed hungry plants. Straw is my go-to for strawberry patches and winter protection.
**Application matters**: Spread mulch 2-4 inches deep, keeping it a few inches away from plant stems to prevent rot and discourage pests. Spring and fall are ideal mulching times, though you can refresh as needed throughout the season.
Here’s a tip from organic gardening expert Sarah Raven: “Mulch when soil is already moist—you’re locking in that precious water, not keeping it out.” This timing trick dramatically reduces your irrigation needs.
Beyond weed suppression and water conservation, mulch moderates soil temperature extremes, protects beneficial soil organisms, and prevents erosion during heavy rains. As it decomposes, it becomes humus, that magical substance every gardener dreams about!
Natural Soil Amendments You Can Make at Home
Creating your own soil amendments is easier than you think, and it’s incredibly rewarding! Start with **worm castings**—nature’s perfect fertilizer. If you keep a small worm bin, you’ll have rich, nutrient-dense castings year-round. **Compost tea** is another game-changer: simply steep finished compost in water for 24-48 hours, strain, and apply to give plants an instant nutrient boost.
For a longer-term approach, try **green manures** like clover or vetch. Plant them in off-season beds, then till them under before planting. They add nitrogen and organic matter while suppressing weeds—talk about multitasking! These DIY amendments not only replace synthetic fertilizers but actually improve your soil health practices over time, creating a thriving ecosystem beneath your feet. Your plants will thank you with vigorous growth and better yields.
Smart Watering Practices That Conserve Resources
Drip Irrigation and Soaker Hoses
Let me tell you about one of my favorite water-saving discoveries: drip irrigation. Unlike traditional sprinklers that spray water everywhere (including your sidewalk and weeds), drip systems deliver water directly to plant roots where it’s needed most.
These systems work through a network of tubes with small emitters that release water slowly and steadily. Soaker hoses, their simpler cousins, are porous tubes that “weep” water along their entire length. Both methods reduce water waste by up to 50% compared to overhead watering—a win for your water bill and the planet!
Installation is surprisingly straightforward. Start by laying out your tubing around plants, securing it with stakes. Connect to an outdoor faucet or rain barrel, and you’re set. Many kits come with everything you need, making it a perfect weekend project.
Renowned gardener Ellen Zachos shared with me that she converted her entire garden to drip irrigation and noticed healthier plants almost immediately. “The consistent moisture means less stress on plants, and because foliage stays dry, I’ve seen fewer fungal diseases,” she explained.
The beauty of these systems? They work while you’re at work, on vacation, or simply enjoying your garden rather than standing around with a hose.

Rainwater Harvesting on Any Budget
Rainwater harvesting doesn’t require a fortune to get started. A simple rain barrel attached to your downspout can collect hundreds of gallons annually, perfect for watering containers and garden beds during dry spells. These basic systems typically cost under $100, or you can DIY one from food-grade barrels.
Ready to expand? Connect multiple barrels with overflow valves, or invest in larger cisterns that store 500+ gallons. I’ve interviewed gardeners who’ve transformed their watering routines with these setups, slashing water bills by 40% during summer months.
Before installing any system, check local regulations—some areas have restrictions, while others offer rebates for rainwater collection. Most municipalities allow residential harvesting, but it’s worth confirming.
Maintenance is straightforward: clean gutters seasonally, add mesh screens to prevent mosquito breeding, and drain systems before freezing temperatures. Use collected water within a week for edibles, or treat it for longer storage. Position barrels on stable platforms near garden areas for easy access. Even a modest setup reduces your environmental footprint while giving plants the chemical-free water they prefer.
When and How to Water for Maximum Efficiency
Timing makes all the difference when it comes to water efficiency. Water early morning—ideally between 5 and 9 AM—when temperatures are cooler and evaporation is minimal. Your plants absorb moisture more effectively, and foliage dries before nightfall, reducing disease risk.
Here’s a game-changer: water deeply but less frequently. Instead of daily sprinkles that encourage shallow roots, soak the soil 6-8 inches down once or twice weekly. This trains roots to grow deeper, creating more resilient plants that naturally withstand drought.
Learn to read your garden’s signals. Wilting in morning hours means it’s genuinely thirsty, but afternoon drooping often resolves itself by evening. Stick your finger two inches into the soil—if it’s moist, hold off watering. Yellowing lower leaves or stunted growth often indicate overwatering, not underwatering. Trust me, I’ve killed more plants with kindness than neglect! Pay attention to these cues, and you’ll develop an intuitive sense for your garden’s needs.
Managing Pests and Diseases Without Chemicals
Creating a Pest-Resistant Garden Ecosystem
Nature offers the best pest control when you work with it rather than against it. Instead of reaching for chemical sprays, build a garden ecosystem that naturally keeps pests in check—it’s easier than you might think!
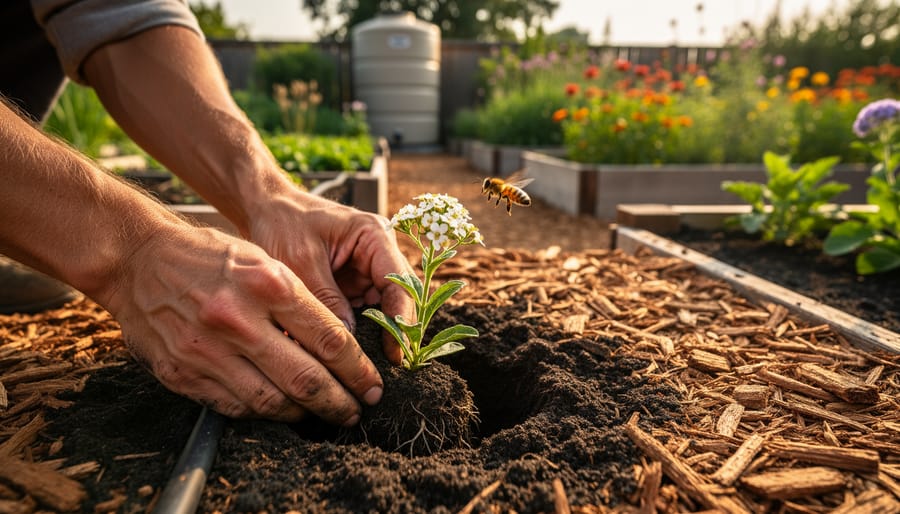
Start with companion planting, a time-tested strategy where certain plants protect each other. Marigolds deter aphids and whiteflies, while basil planted near tomatoes repels hornworms and improves flavor. Nasturtiums act as “trap crops,” luring aphids away from your precious vegetables. I’ve seen this work beautifully in my own garden—my cabbage patch surrounded by aromatic herbs rarely suffers pest damage.
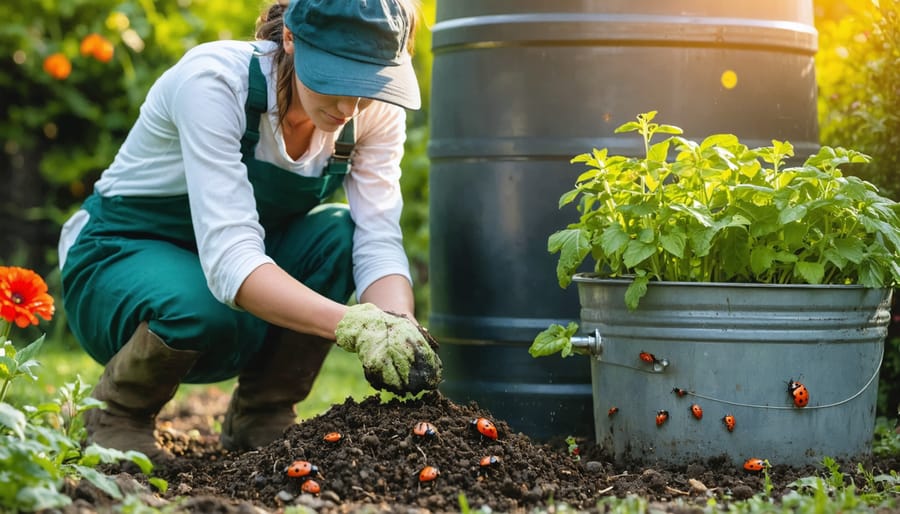
Attract beneficial insects by planting flowers that provide nectar and pollen. Ladybugs, lacewings, and parasitic wasps feast on common pests. Try yarrow, sweet alyssum, and fennel to roll out the welcome mat for these garden allies. Leave small water sources like shallow dishes with pebbles for them to drink safely.
Plant diversity is your secret weapon. Mix flowers, herbs, and vegetables throughout your beds rather than planting large blocks of single crops. This confuses pests and prevents infestations from spreading rapidly. A varied garden also supports more beneficial species, creating a balanced ecosystem that manages itself with minimal intervention from you.

Natural Pest Control Methods That Actually Work
You don’t need harsh chemicals to keep pests at bay—effective natural pest control starts with simple prevention. Physical barriers like row covers, copper tape for slugs, and netting work wonders for protecting vulnerable plants. I’ve had great success with companion planting too—marigolds near tomatoes genuinely deter aphids!
For homemade sprays, mix a tablespoon of dish soap with water to combat soft-bodied insects, or blend garlic and cayenne pepper for a potent deterrent. Apply early morning or evening to avoid leaf burn. When you need stronger solutions, look for organic products containing neem oil, diatomaceous earth, or Bacillus thuringiensis (Bt)—these target specific pests without harming beneficial insects.
The key is monitoring your garden regularly and acting quickly at the first sign of trouble. Hand-picking larger pests like caterpillars and beetles might seem tedious, but it’s surprisingly effective for small infestations. Remember, a few nibbled leaves are normal—healthy gardens support diverse ecosystems, including some pest activity!
Prevention: Your Best Defense
The best way to handle pests sustainably? Don’t let them become problems in the first place! I’ve learned this lesson after years of fighting battles that could’ve been avoided with smarter planning.
Start with crop rotation—moving plant families to different spots each season breaks pest life cycles naturally. If aphids loved your tomatoes last year, they won’t find them in the same spot this season. Simple, but incredibly effective!
Proper spacing deserves more credit than it gets. When I stopped cramming plants together, air circulation improved dramatically, reducing fungal diseases and creating less hospitable conditions for pests. Yes, those spacing recommendations on seed packets actually matter.
Choose naturally resistant varieties whenever possible. Many modern cultivars have been bred for pest and disease resistance—why make your job harder? Local nurseries often carry varieties that thrive in your specific region, already adapted to handle common local challenges.
Companion planting adds another layer of protection. Marigolds near vegetables, basil alongside tomatoes—these partnerships confuse pests and attract beneficial insects who’ll do the pest control for you.
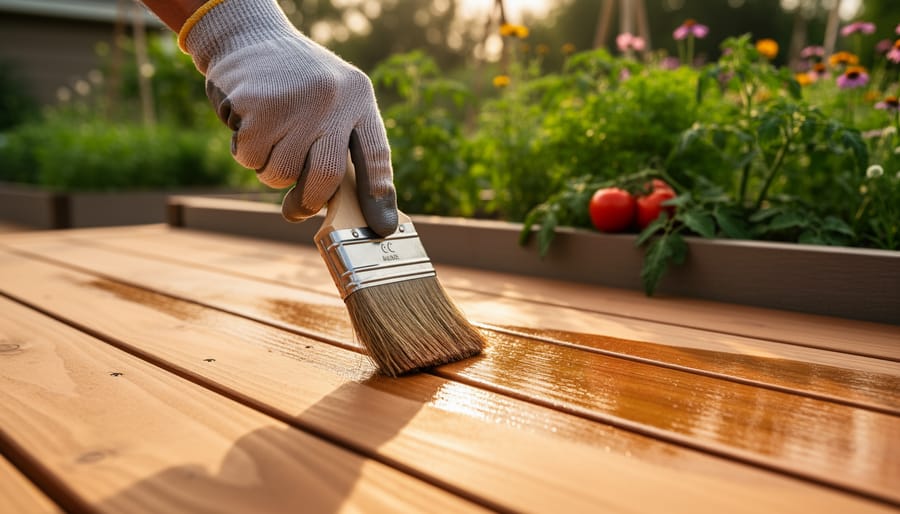
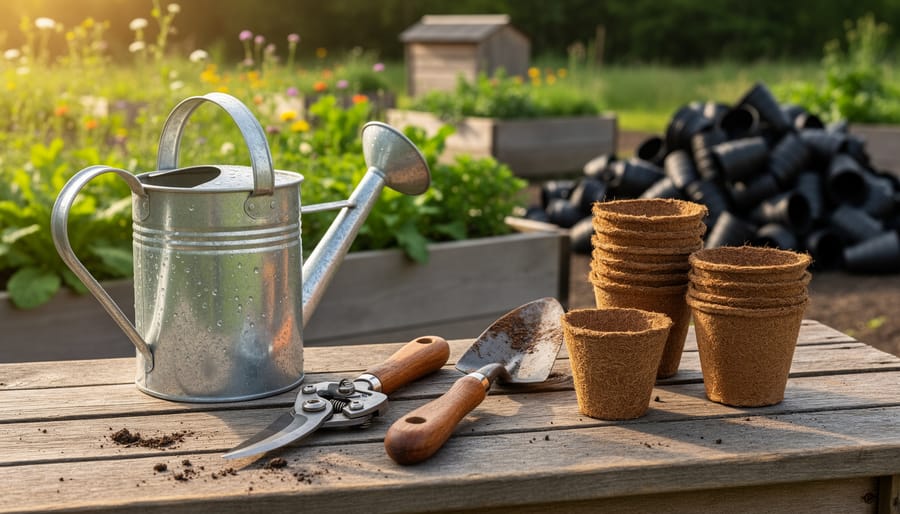
Choosing the Right Tools and Equipment
Investing in quality tools might cost more upfront, but it’s one of the smartest moves you can make for both your garden and the planet. I learned this lesson after my third cheap plastic trowel snapped in half—those “bargain” tools ended up costing me more in replacements than a single well-made version ever would have.
Start by choosing sustainable garden tools made from durable materials like stainless steel, carbon steel, or sustainably sourced wood. These materials resist rust, hold their edge longer, and can last decades with proper care. Look for tools with replaceable parts—handles that can be swapped out or blades that can be resharpened—rather than disposable units that end up in landfills.
Hand tools are your sustainable workhorses. Manual cultivators, pruners, and spades require zero electricity and give you better control over your work. They’re quieter too, which your neighbors will appreciate on Saturday mornings! For larger properties where power tools make sense, opt for electric over gas-powered options. Battery-operated models have improved dramatically and eliminate emissions while you work.
Storage matters more than you’d think. Keep your tools clean, dry, and oiled to prevent rust and deterioration. A simple garden shed or even a weatherproof box can triple their lifespan.
Consider buying secondhand or vintage tools from estate sales or online marketplaces. Older tools were often built to last and just need some TLC to become reliable again. This approach reduces waste while often scoring you better quality than modern budget alternatives.
Remember, the most sustainable tool is the one you already own and maintain well.

Low-Maintenance Plant Selection Strategies
Choosing the right plants from the start is one of the smartest shortcuts to a thriving, low-maintenance garden. Think of it like assembling a team—you want players who already know the game and can handle the local conditions without constant coaching.
**Start with Native Plants**
Native plants are your garden’s MVPs. They’ve spent thousands of years adapting to your region’s rainfall patterns, soil types, and temperature swings. This means they naturally need less water, fewer fertilizers, and rarely attract pests they can’t handle on their own. Check with your local native plant society or university extension office for specific recommendations. I learned this lesson after watching my water-guzzling hostas struggle through three summers while the native coneflowers next door thrived with zero intervention.
**Look for “Adapted” Plants Too**
Don’t limit yourself only to natives. “Adapted” plants—non-natives that perform well in your climate—can also be excellent low-maintenance choices. Mediterranean herbs like rosemary and lavender, for example, flourish in hot, dry climates similar to their homeland.
**Practical Selection Tips**
Visit local nurseries during peak summer to see which plants look healthy without constant watering. Talk to neighboring gardeners about what thrives in their yards with minimal fuss. Match plants to your specific site conditions—don’t fight nature by planting sun-lovers in shade or moisture-lovers in dry spots. And remember: disease-resistant varieties save countless hours of troubleshooting later. Your future self will thank you for choosing wisely now.
Creating Your Sustainable Maintenance Schedule
Creating a maintenance schedule that actually works doesn’t mean cramming every sustainable practice into your calendar at once. Think of it as building a friendship with your garden—you’re establishing a rhythm that suits both of you.
Start by observing your garden through one complete season before making major changes. Keep a simple journal noting when plants need attention, when pests appear, and what the weather typically does. This baseline helps you spot patterns and avoid the common mistake of over-scheduling tasks you don’t actually need.
**Spring: Foundation Work**
Focus on soil preparation as your garden wakes up. Schedule one morning per month to add compost and check mulch levels. Set aside time every two weeks for planting and transplanting. Spring is also when you’ll establish your watering routine—initially more frequent as plants settle in.
**Summer: Maintenance Mode**
Shift to weekly garden walks for observation and light maintenance. Water deeply but less frequently, encouraging strong root systems. Schedule pest checks every few days during peak season, but remember that seeing some insects is normal and healthy. Dedicate one weekend morning monthly for larger projects like propagating plants or building compost.
**Fall: Preparation Time**
As things slow down, focus on soil enrichment and winter prep. Plan bi-weekly sessions for planting cover crops, spreading leaf mulch, and dividing perennials.
**Winter: Rest and Planning**
Limit yourself to monthly check-ins. Use this quieter time for tool maintenance and planning next year’s improvements.
The secret? Start with just three sustainable practices this year. Master those before adding more. Your garden will thrive better with consistent simple care than sporadic complicated efforts.
Transforming your garden into a more sustainable space doesn’t have to happen overnight. The beauty of sustainable gardening is that every small change you make creates a ripple effect—improving soil health, supporting local wildlife, and reducing your environmental footprint one practice at a time. There’s no need to feel overwhelmed by implementing everything at once.
Start where you feel most comfortable. Perhaps you’ll begin by setting up a simple rain barrel to capture water, or maybe you’ll dedicate a corner of your yard to composting kitchen scraps. Choose one or two practices that resonate with you and fit naturally into your routine. As these become second nature, you’ll find yourself eager to try another technique, then another. Before you know it, sustainable choices will feel like the obvious way to garden.
Remember, you’re not alone on this journey. Across neighborhoods and continents, a growing community of gardeners is making these same thoughtful choices. They’re sharing successes, learning from setbacks, and discovering that sustainable methods often produce healthier, more resilient gardens than conventional approaches ever did.
Your garden is uniquely yours, and so is your path to sustainability. Trust that your efforts matter—because they absolutely do. Each native plant you introduce, every drop of water you conserve, and all the pesticides you choose not to use contribute to a healthier planet. Welcome to the world of sustainable gardening, where your small steps today cultivate a greener tomorrow.