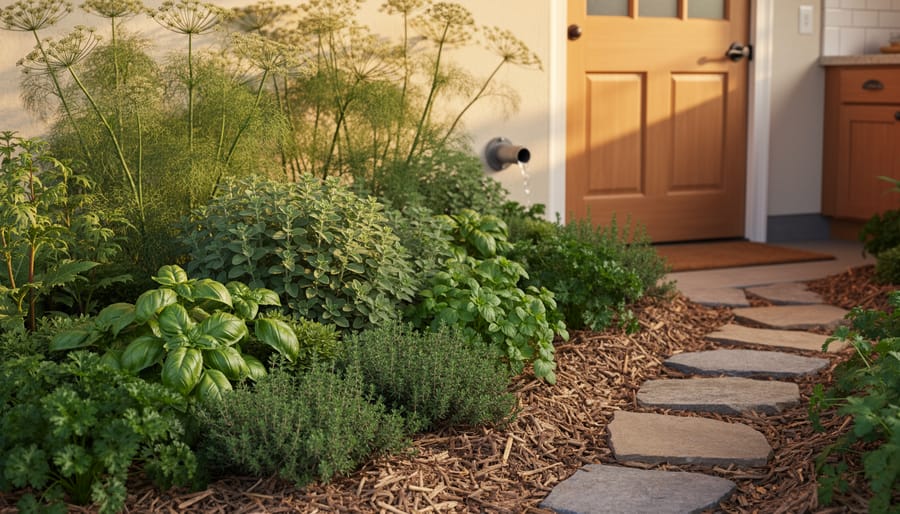
Place your most frequently harvested herbs—basil, parsley, cilantro—within three steps of your kitchen door, creating a zone of constant interaction that eliminates the excuse of inconvenience. Layer plants vertically by stacking tall dill and fennel behind mid-height oregano, with creeping thyme filling ground spaces, mimicking forest edge ecosystems that suppress weeds naturally while tripling your growing area. Install a simple greywater system by redirecting your kitchen sink water through a basic filter to a mulched herb bed, cutting irrigation time by 70% while feeding plants the nutrients they actually need.
Transform problem spots into productive zones by planting Mediterranean herbs like rosemary and lavender on that dry hillside where nothing grows, or establishing mint and lemon balm in the perpetually damp area near your downspout. Group plants by water requirements rather than aesthetics—drought-tolerant sage, thyme, and marjoram together in sandy soil, moisture-loving chervil and lovage in richer areas—so you stop overwatering some plants while underwatering others.
This approach isn’t about following rigid permaculture rules or creating picture-perfect garden layouts. It’s about observing what your space actually does—where water pools, which areas get afternoon shade, where you naturally walk—and working with those patterns instead of fighting them. The result is a garden that practically tends itself, produces abundantly, and gets easier to manage each season as plants self-seed, beneficial insects establish, and natural systems take over the heavy lifting you’ve been doing manually for years.
What Makes Permaculture Different from Traditional Herb Gardening
The Three Core Principles That Change Everything
Permaculture rests on three foundational principles that transform how we approach herb gardening. Let me show you how these work in real-world practice.
Earth care means designing your herb garden to actually improve the soil rather than deplete it. Instead of tilling and disrupting beneficial organisms, you’ll layer organic materials like leaves and compost directly on the surface. I once visited a gardener in Oregon who transformed her compacted clay into rich, crumbly soil simply by mulching around her rosemary and thyme for two seasons. The plants thrived while earthworms did all the work.
People care recognizes that your herb garden should make your life easier, not harder. Position frequently used herbs like basil and parsley closest to your kitchen door. Plant perennials like oregano and sage where you won’t need to replant annually. This principle asks: does this design serve you, or are you serving the garden?
Fair share encourages abundance that extends beyond your own needs. When your lemon balm spreads enthusiastically (and it will), share divisions with neighbors. Let some cilantro go to seed for the pollinators and next year’s crop. Harvest only what you’ll use, allowing plants to regenerate.
These principles aren’t restrictive rules. They’re guideposts that help you create a herb garden that sustains itself while sustaining you. When you design with all three in mind, maintenance decreases while harvests increase naturally.
Why Your Herbs Thrive When You Stop Fighting Nature
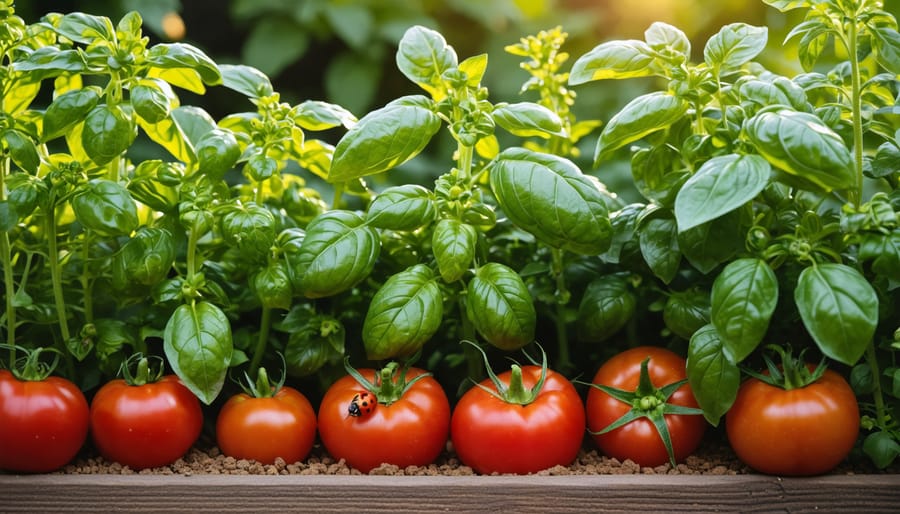
I’ll never forget the summer I stopped battling my basil. For years, I’d been planting it in neat rows, fighting the shade from nearby tomatoes, and watching half my plants struggle. Then I simply observed where volunteer basil seedlings thrived—in dappled afternoon shade with morning sun—and moved my plantings there. The difference was remarkable.
This is permaculture’s secret: nature already knows what works. Instead of forcing herbs into predetermined spots, spend a few weeks watching how sun moves across your space, where water naturally pools after rain, and which areas stay cooler or warmer. Your garden is telling you exactly where each herb wants to grow.
When you align with these patterns, everything gets easier. Shade-loving cilantro naturally fits under taller plants. Sun-worshipping rosemary claims that hot, dry corner you’ve struggled with. Water-loving mint settles near downspouts. You’re not imposing a design—you’re discovering one that’s already there.
According to permaculture designer Lisa Thompson, whom I interviewed last spring, “The garden designs itself when you listen. Your only job is to notice and respond.” That shift from fighting to flowing transforms not just your harvest, but your entire gardening experience.
Observing Your Space Before You Plant a Single Seed

The Sun Map Technique for Herb Placement
Here’s a simple technique I learned from a fellow gardener in Oregon that transformed how I place my herbs. Grab a clipboard and create a simple site map of your garden area. Then, observe your space at three key times: early morning (around 8am), midday (noon), and late afternoon (4pm). Walk through and sketch where shadows fall at each interval. Do this during different seasons if possible, or at minimum note where deciduous trees will create summer shade.
Mark your findings with three categories: full sun areas (6+ hours of direct light), partial sun zones (3-6 hours), and shaded spots (under 3 hours). This visual record becomes your placement guide. Mediterranean herbs like rosemary, thyme, and lavender thrive in those full sun hotspots, while parsley, cilantro, and mint appreciate partial shade, especially during intense summer afternoons.
I recommend repeating this observation at least twice before planting. It feels slow at first, but you’ll save countless hours moving misplaced plants later. One gardener I interviewed discovered her “perfect sunny spot” was actually shaded by her neighbor’s garage for four afternoon hours, information that saved her entire basil crop from disappointment.
Reading Your Soil’s Story
Your soil holds secrets that’ll make or break your permaculture herb garden, but you don’t need a lab coat to read them. Start with the simple jar test: fill a clear container halfway with soil, add water to the top, shake vigorously, and let it settle overnight. The layers that form tell your soil’s story—sand sinks first, then silt, with clay floating on top. This quick peek reveals your soil texture without spending a dime.
Next, observe drainage by digging a hole about a foot deep, filling it with water, and watching how quickly it disappears. Water gone in minutes? You’ve got sandy, fast-draining soil perfect for Mediterranean herbs like rosemary and thyme. Still pooling after several hours? Clay-heavy soil suits moisture-loving herbs such as mint.
Check for existing nutrients by looking at what’s already thriving. Lush, dark-green weeds suggest nitrogen-rich soil, while stunted growth might indicate deficiencies. Squeeze a handful of moist soil—if it forms a ball that crumbles easily, you’re in great shape. These observations give you everything needed to design around your soil’s natural strengths rather than fighting against them.
Creating Zones That Actually Make Sense for Your Life
Zone 1: Your Kitchen Window Herbs
Your kitchen window herbs are the superstars of your permaculture design—the ones you’ll reach for multiple times daily. This prime real estate zone should include basil, parsley, cilantro, chives, and mint. Think about your morning omelet or evening pasta sauce, and position these herbs where you can literally snip them while cooking.
The key to effective kitchen herb garden design is honest observation. How often do you actually use fresh herbs? Place your most-grabbed varieties closest to your kitchen door or window. I’ve found that keeping basil within arm’s reach means I use three times more than when it’s buried in the back garden.
Container gardens work beautifully here too, giving you flexibility to rotate plants based on the season and your cooking habits.
Zone 2 and Beyond: Perennial Herbs That Take Care of Themselves
Zone 2 becomes your home for herbs you’ll harvest less frequently but still want reasonably accessible. Think of perennial herb gardens featuring lovage, sorrel, and comfrey—plants that thrive on benign neglect. These hardy perennials require minimal attention once established, making them perfect candidates for this outer zone.
Position these herbs along pathways you regularly travel or near the compost bin where you’ll naturally pass by. This strategic placement means you won’t forget about them entirely, yet they won’t demand the constant care of your Zone 1 basil and parsley. Beyond Zone 2, consider naturalizing wild herbs like yarrow or establishing a medicinal herb patch that you’ll visit seasonally. These self-seeding varieties often handle weeds, pests, and watering entirely on their own, embodying permaculture’s work-with-nature philosophy perfectly.
Building Herb Guilds That Support Each Other
The Mediterranean Guild: Rosemary, Thyme, and Friends
Mediterranean herbs form one of nature’s most harmonious plant communities, and they’re perfect for permaculture gardens. Rosemary, thyme, oregano, sage, and lavender share nearly identical growing conditions—they all crave full sun, well-drained soil, and prefer staying on the drier side between waterings.
I like to think of these herbs as old friends from the same hometown. They naturally understand each other’s needs because they evolved together in similar climates. Plant them in a sunny bed with sandy or gravelly soil, and they’ll practically care for themselves.
Here’s a winning combination I’ve used for years: Create a raised bed or mounded area with rosemary as the tallest anchor plant at the back or center. Surround it with thyme varieties as ground covers, tucking in oregano and sage between them. Edge everything with low-growing lavender for that pop of purple in summer.
These herbs also welcome companion plants like santolina, catmint, and yarrow, which share their Mediterranean heritage. Together, they create a drought-tolerant guild that attracts beneficial insects while deterring pests—all with minimal intervention from you.

The Moisture-Loving Team: Mint, Parsley, and Chives
If you have a shadier, damper spot in your garden, mint, parsley, and chives make wonderful companions. This trio thrives in areas that would challenge their sun-loving cousins, transforming those tricky microclimates into productive spaces.
Plant mint in containers within this guild to prevent its notorious spreading habit, but position those pots close enough that the plants still benefit from the guild relationship. Parsley acts as the centerpiece, attracting beneficial insects like hoverflies and parasitic wasps that keep aphids in check. Chives contribute with their light purple blooms that draw pollinators while naturally repelling many garden pests.
I discovered this combination works beautifully along the north side of my fence, where morning sun gives way to afternoon shade. The soil stays consistently moist there without my intervention, and these herbs practically take care of themselves. Water them together during dry spells, and they’ll reward you with abundant harvests throughout the growing season. This guild proves that even your garden’s challenging spots can become low-maintenance, high-yielding areas when you match plants to their preferred conditions.
Adding Support Players: Flowers and Groundcovers
Think of flowers and groundcovers as your garden’s support team—they work quietly behind the scenes to make everything else thrive. Nasturtiums are fantastic multi-taskers, attracting aphids away from your herbs while drawing in pollinators with their cheerful blooms. Plant them at the edges of your beds or let them trail between larger herbs.
White clover makes an excellent living mulch, fixing nitrogen in the soil while keeping weeds at bay. I love how it creates a soft carpet between stepping stones and around taller plants. For shady spots, try creeping thyme or sweet woodruff—they’ll release wonderful scents when brushed against and suppress unwanted growth.
Borage is another permaculture favorite, with blue flowers that bees adore and leaves that accumulate nutrients from deep in the soil. When it dies back, those nutrients return to your topsoil. Calendula not only adds vibrant color but also has medicinal properties and helps maintain biodiversity in herb gardens.
The key is choosing plants that serve multiple functions—beauty, pest management, soil improvement, and pollinator support all wrapped into one.
Designing Water Systems That Work for You
Simple Contour Planting on Any Slope
Working with your land’s natural contours is one of the smartest water management strategies you can adopt, and it doesn’t require a degree in engineering. Simply observe how water flows across your property during rain. You’ll notice it naturally follows certain paths downhill.
Here’s how to harness this: Plant your herbs along these contour lines, which are simply the level paths that wrap around your slope. Think of them like invisible rings circling a hill at the same elevation. When you plant along these lines, water slows down and soaks in instead of rushing away.
Start small by walking your garden during a gentle rain. Notice where puddles form and where water runs fastest. Place thirsty herbs like mint and lovage where water naturally collects. Position drought-tolerant lavender and rosemary higher up where drainage is better.
Even a gentle 2-degree slope creates opportunities. You don’t need terraces or elaborate structures. Sometimes just arranging plants in gentle curved rows that follow the land’s shape makes all the difference. The goal is working with nature, not against it, letting gravity become your irrigation assistant.
Mulching Magic: Keep Moisture Where It Belongs
Mulching is one of those garden tasks that feels almost too good to be true—it reduces watering, suppresses weeds, and feeds your soil as it breaks down. For herb gardens in a permaculture design, choosing the right mulch makes all the difference.
Mediterranean herbs like rosemary, thyme, and lavender prefer light, inorganic mulches such as pea gravel or crushed stone. These materials reflect heat, prevent moisture from sitting around stems, and mimic their native rocky habitats. I learned this the hard way when wood chips rotted the base of my lavender plants one particularly wet spring!
For moisture-loving herbs like parsley, cilantro, and mint, organic mulches work beautifully. Straw, shredded leaves, or aged wood chips keep soil consistently moist while slowly feeding beneficial microorganisms. Apply a 2-3 inch layer, keeping it a few inches away from plant stems to prevent rot.
Avoid fresh grass clippings, which can mat down and create anaerobic conditions, and dyed mulches that may contain chemicals. Cardboard or newspaper underneath organic mulch creates an excellent weed barrier while eventually decomposing to enrich your soil. The key is matching your mulch to each herb’s water needs, creating microclimates within your garden that work with nature rather than against it.

Creating Living Soil Instead of Just Dirt
The No-Dig Advantage for Herb Gardens
Here’s the good news: you don’t need to disturb your soil to create a thriving herb garden. No-dig methods like lasagna layering and sheet mulching work with nature rather than against it, protecting the complex underground ecosystem that keeps your herbs healthy.
Think of lasagna layering as building healthy soil the way you’d make dinner. Start by laying down cardboard or newspaper directly over grass or weeds to suppress growth. Then alternate layers of carbon-rich materials like dried leaves and straw with nitrogen-rich materials like grass clippings and compost. Aim for roughly two parts carbon to one part nitrogen, and keep each layer around three inches thick.
Sheet mulching follows a similar principle but creates a lower-profile bed. Both techniques preserve beneficial fungi, earthworms, and microorganisms that tilling would destroy. These soil helpers do the work for you, breaking down organic matter and creating perfect growing conditions.
The best part? You can plant right away if you’ve added enough finished compost on top. Your herbs will establish roots while the layers beneath continue improving soil structure for seasons to come.
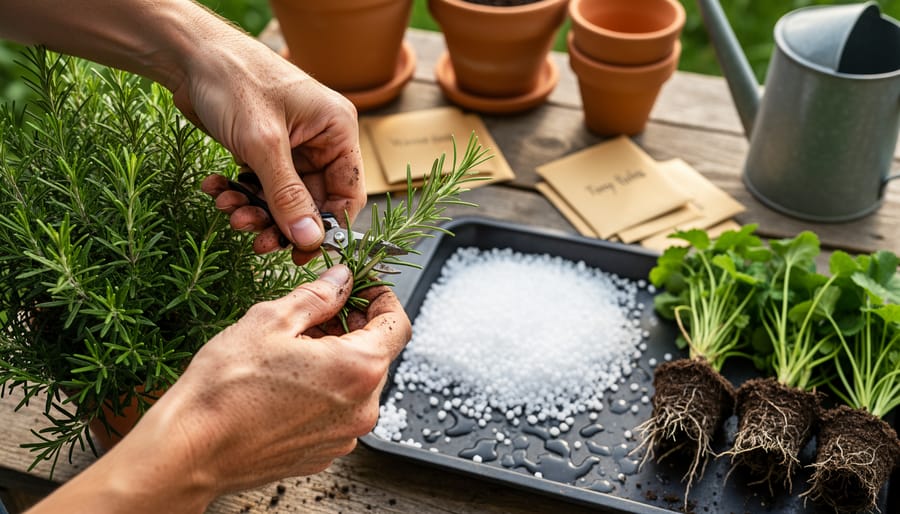
Closing the Loop: Using Your Kitchen Scraps
One of my favorite aspects of permaculture is how nothing goes to waste. Your kitchen scraps become tomorrow’s plant nutrients, completing a beautiful cycle right in your own space.
Start simple with a compost bin placed strategically near your herb garden. I keep mine just steps from my kitchen door because the closer it is, the more likely you’ll use it. Layer your green materials like vegetable peels and herb trimmings with brown materials such as dry leaves or shredded paper. This balance creates the perfect environment for decomposition.
For smaller spaces, consider worm composting bins that tuck neatly under sinks or on balconies. Worms work quickly and create incredibly nutrient-rich castings your herbs will love. I started mine in a plastic storage bin and never looked back.
Here’s a game-changer: designate a small area of your garden as a composting zone where you directly bury kitchen scraps between plants. This trench composting method feeds your soil exactly where you need it while eliminating extra steps. Just dig a shallow hole, add scraps, cover with soil, and let nature do the rest. Your herbs will thank you with vigorous growth and enhanced flavor.
Making Your Design Beautiful and Functional
The Classic Herb Spiral: Form Meets Function
An herb spiral is one of permaculture’s most elegant solutions, packing diverse growing conditions into just a few square feet. Picture a stone spiral rising about three feet high, creating sun-drenched Mediterranean conditions at the top and cool, moist spots at the base. You’re essentially building a miniature mountain range for your herbs.
Start by outlining a spiral shape about five to six feet across on level ground. Build upward using stones, bricks, or urbanite, creating a gradually ascending pathway that spirals inward. Fill the center with well-draining soil mixed with sand and compost. As you work outward and downward, transition to richer, moisture-retentive soil.
Now comes the rewarding part: planting according to each microclimate. Place sun-loving rosemary, thyme, and oregano at the sunny, dry summit. Mid-level spots suit basil, cilantro, and parsley. The shadier, damper base becomes home for mint, chives, and lemon balm.
The beauty? You’ve created four distinct growing zones without moving beyond your arm’s reach. Water from the top trickles down naturally, and the spiral shape gives you accessible planting surfaces on all sides. One structure, harvested year-round, with minimal maintenance. That’s permaculture working smarter, not harder.

Starting Small and Expanding Naturally
Here’s the truth about permaculture gardens: they’re not created overnight, and that’s actually their greatest strength. If you’re feeling overwhelmed by grand visions of elaborate garden designs, take a deep breath. The best approach is to start small and let your garden expand as you learn.
Begin with just a few essential herbs in a manageable space, perhaps a 10×10 foot area near your kitchen door. This creates what permaculturists call Zone 1, the area you’ll visit most frequently. Plant your go-to herbs like basil, parsley, and chives here where you can easily grab them while cooking. As you tend this small space daily, you’ll naturally observe what works and what doesn’t.
I spoke with permaculture designer Elena Martinez, who’s transformed dozens of conventional gardens. She advises, “Start with three herbs you actually use in your cooking. Master those, understand their needs, and then add three more next season. Gardens that evolve gradually are almost always more successful than those rushed into existence.”
This patient approach lets you build soil health incrementally, understand your microclimates, and avoid costly mistakes. Each season, expand outward into Zone 2 with herbs that need less attention, like oregano or thyme. Within two to three years, you’ll have a thriving, low-maintenance system that feels like it grew itself, because in many ways, it did.
Creating a permaculture herb garden isn’t just about growing plants—it’s about building a living ecosystem that works smarter, not harder. By observing your space, understanding natural patterns, and layering functions, you’ll design a garden that practically takes care of itself while producing abundant harvests year after year.
The beauty of permaculture is that you don’t need to get everything perfect from day one. Start small. Spend time watching where the sun falls, where water naturally flows, and which areas of your garden you pass most frequently. These observations will guide you toward placements that make sense for both you and your herbs.
Remember, nature has been perfecting these systems for millions of years. When you work with natural processes rather than against them, you’ll spend less time fighting pests, less money on fertilizers, and less energy on maintenance. Your herb garden becomes a source of joy rather than another weekend chore.
Whether you’re converting a struggling traditional garden or starting fresh, the principles we’ve explored give you everything you need to succeed. Begin by identifying just one zone in your space or choosing three complementary herbs that grow well together. Take that first step today, and trust that each small decision brings you closer to a thriving, resilient garden that nourishes both your kitchen and your connection to the natural world.